Sort by Category
- August 2024
- July 2024
- June 2024
- May 2024
- February 2024
- January 2024
- December 2023
- November 2023
- October 2023
- September 2023
- August 2023
- July 2023
- March 2023
- February 2023
- January 2023
- December 2022
- November 2022
- October 2022
- September 2022
- August 2022
- June 2022
- May 2022
- April 2022
- March 2022
- February 2022
- January 2022
- December 2021
- November 2021
- October 2021
- September 2021
- August 2021
- July 2021
- June 2021
- May 2021
- April 2021
- March 2021
- February 2021
- January 2021
- December 2020
- November 2020
- October 2020
- September 2020
- August 2020
- July 2020
- June 2020
- May 2020
- April 2020
- March 2020
- February 2020
- January 2020
- December 2019
- November 2019
- October 2019
- September 2019
- August 2019
- July 2019
- June 2019
- May 2019
- April 2019
- March 2019
- February 2019
- January 2019
- December 2018
- November 2018
- October 2018
- September 2018
- August 2018
- July 2018
- June 2018
- May 2018
- April 2018
- March 2018
- February 2018

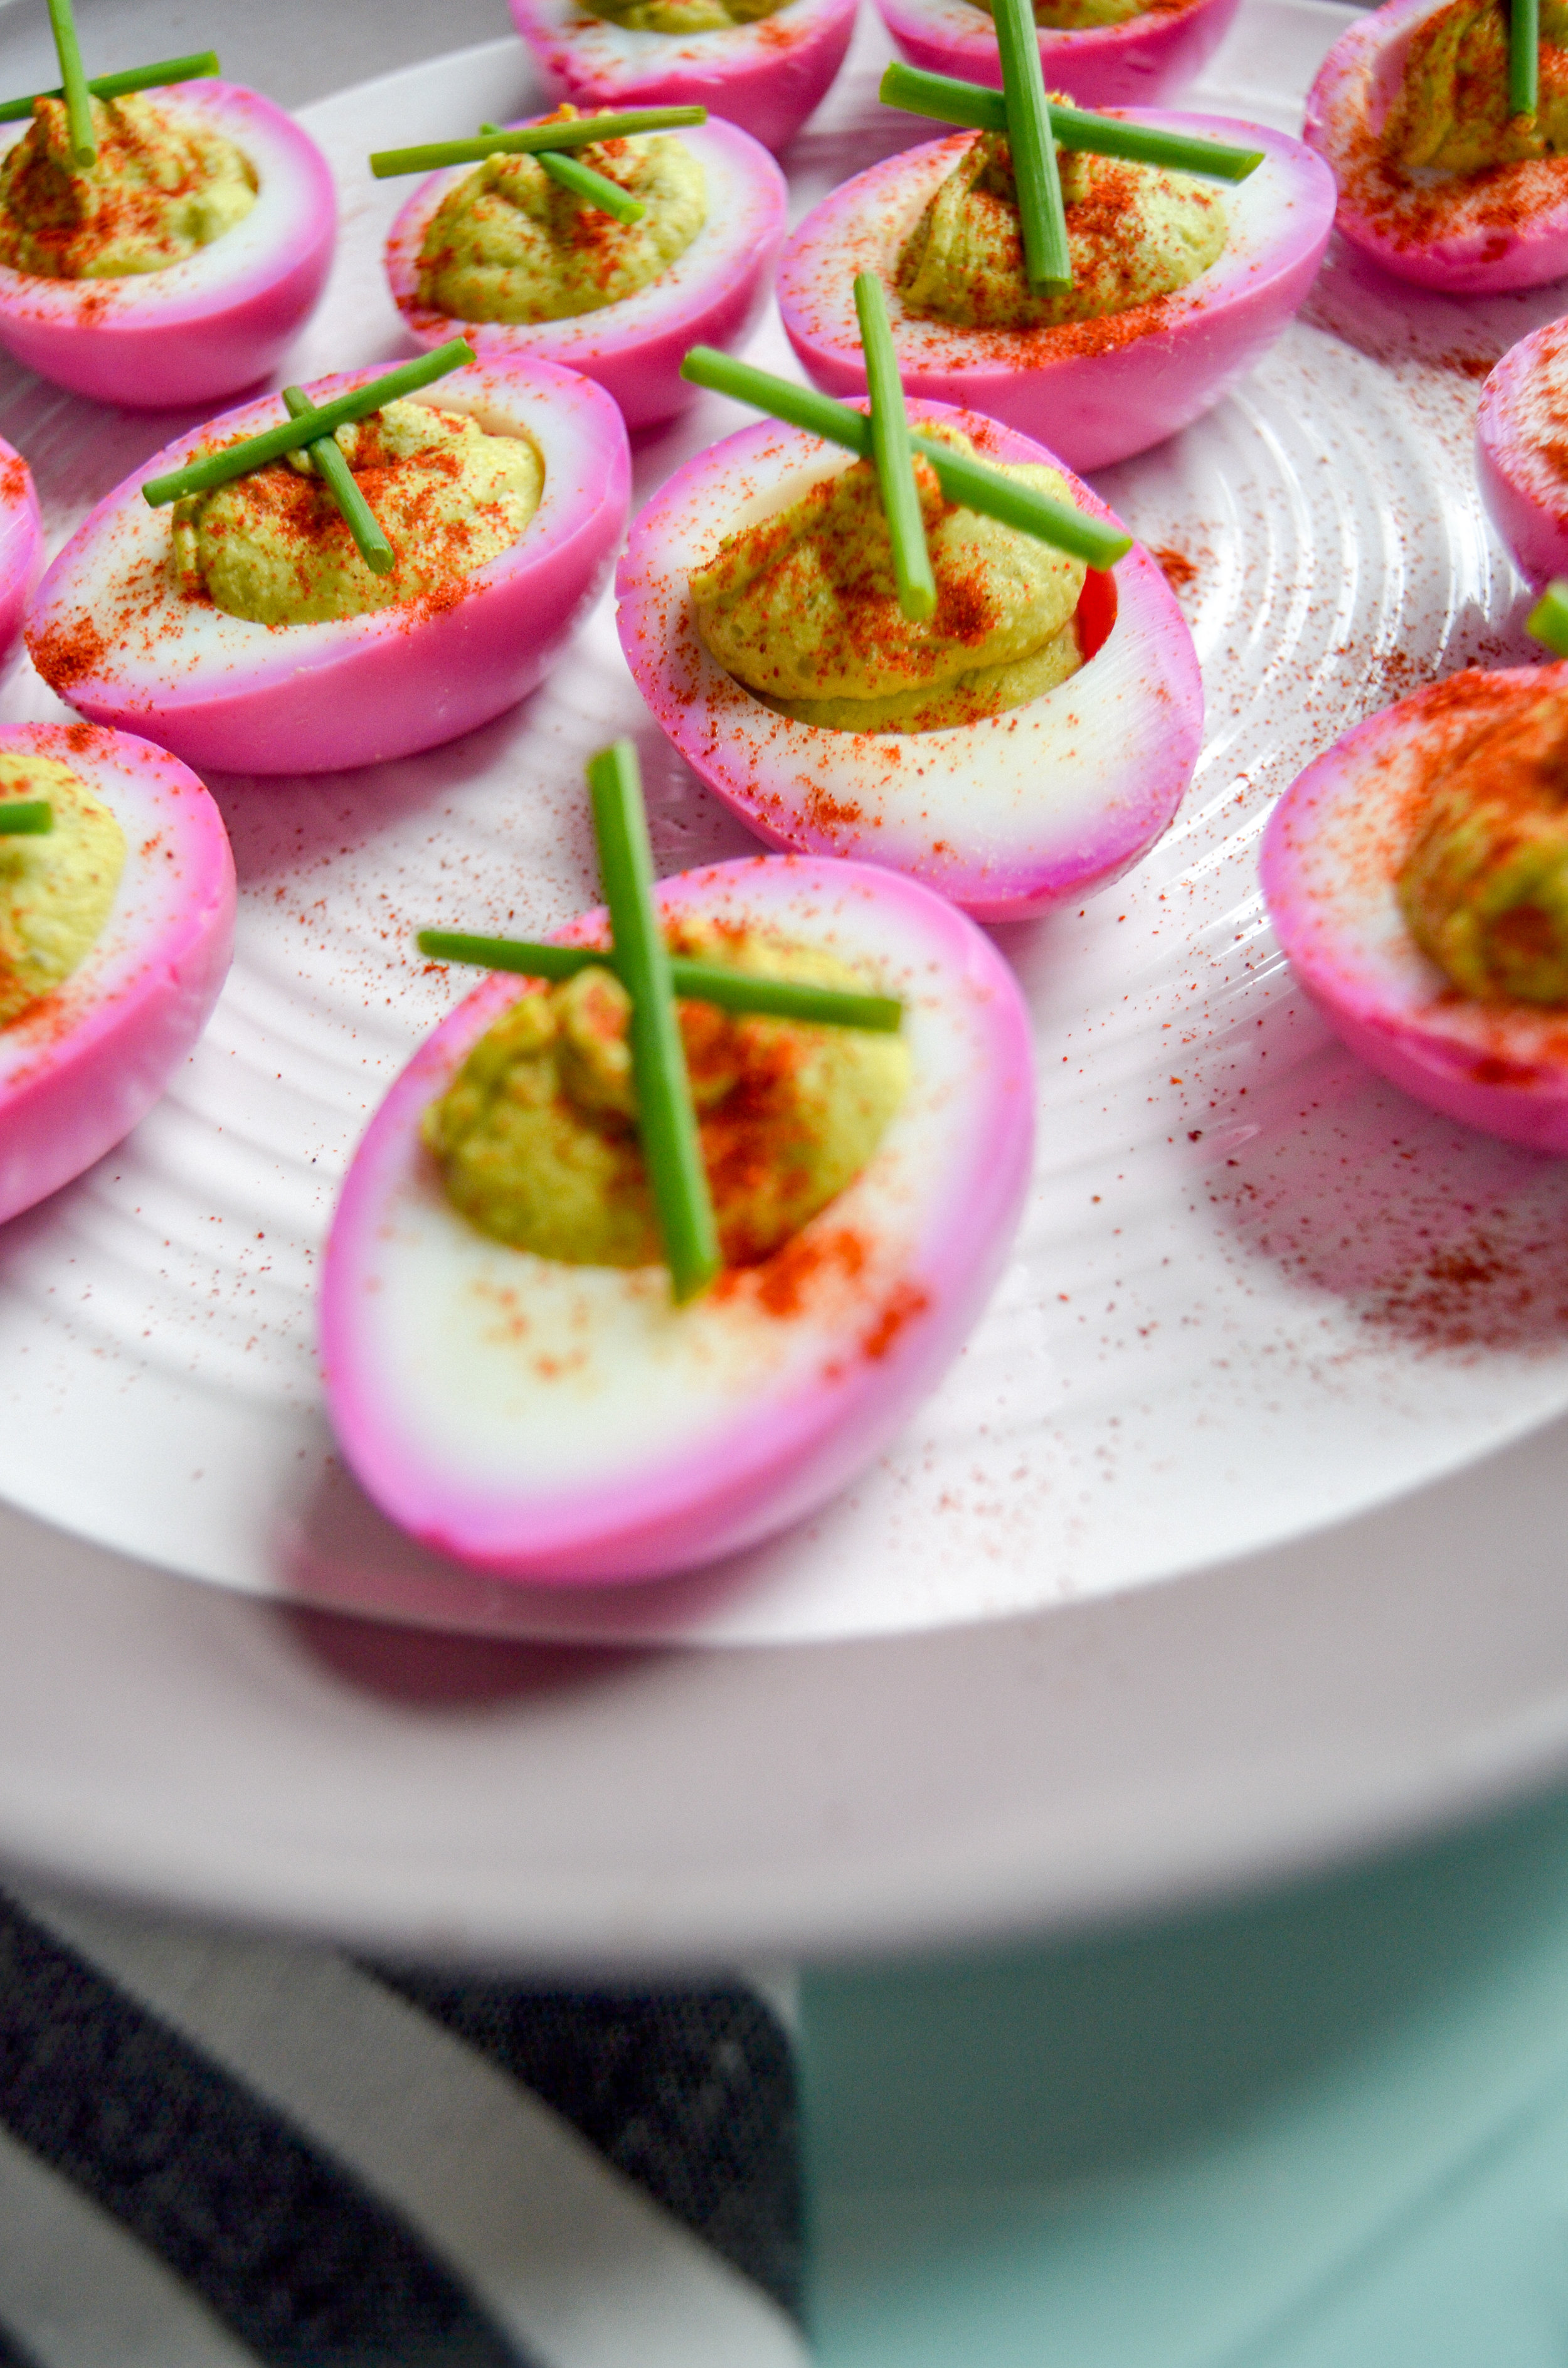
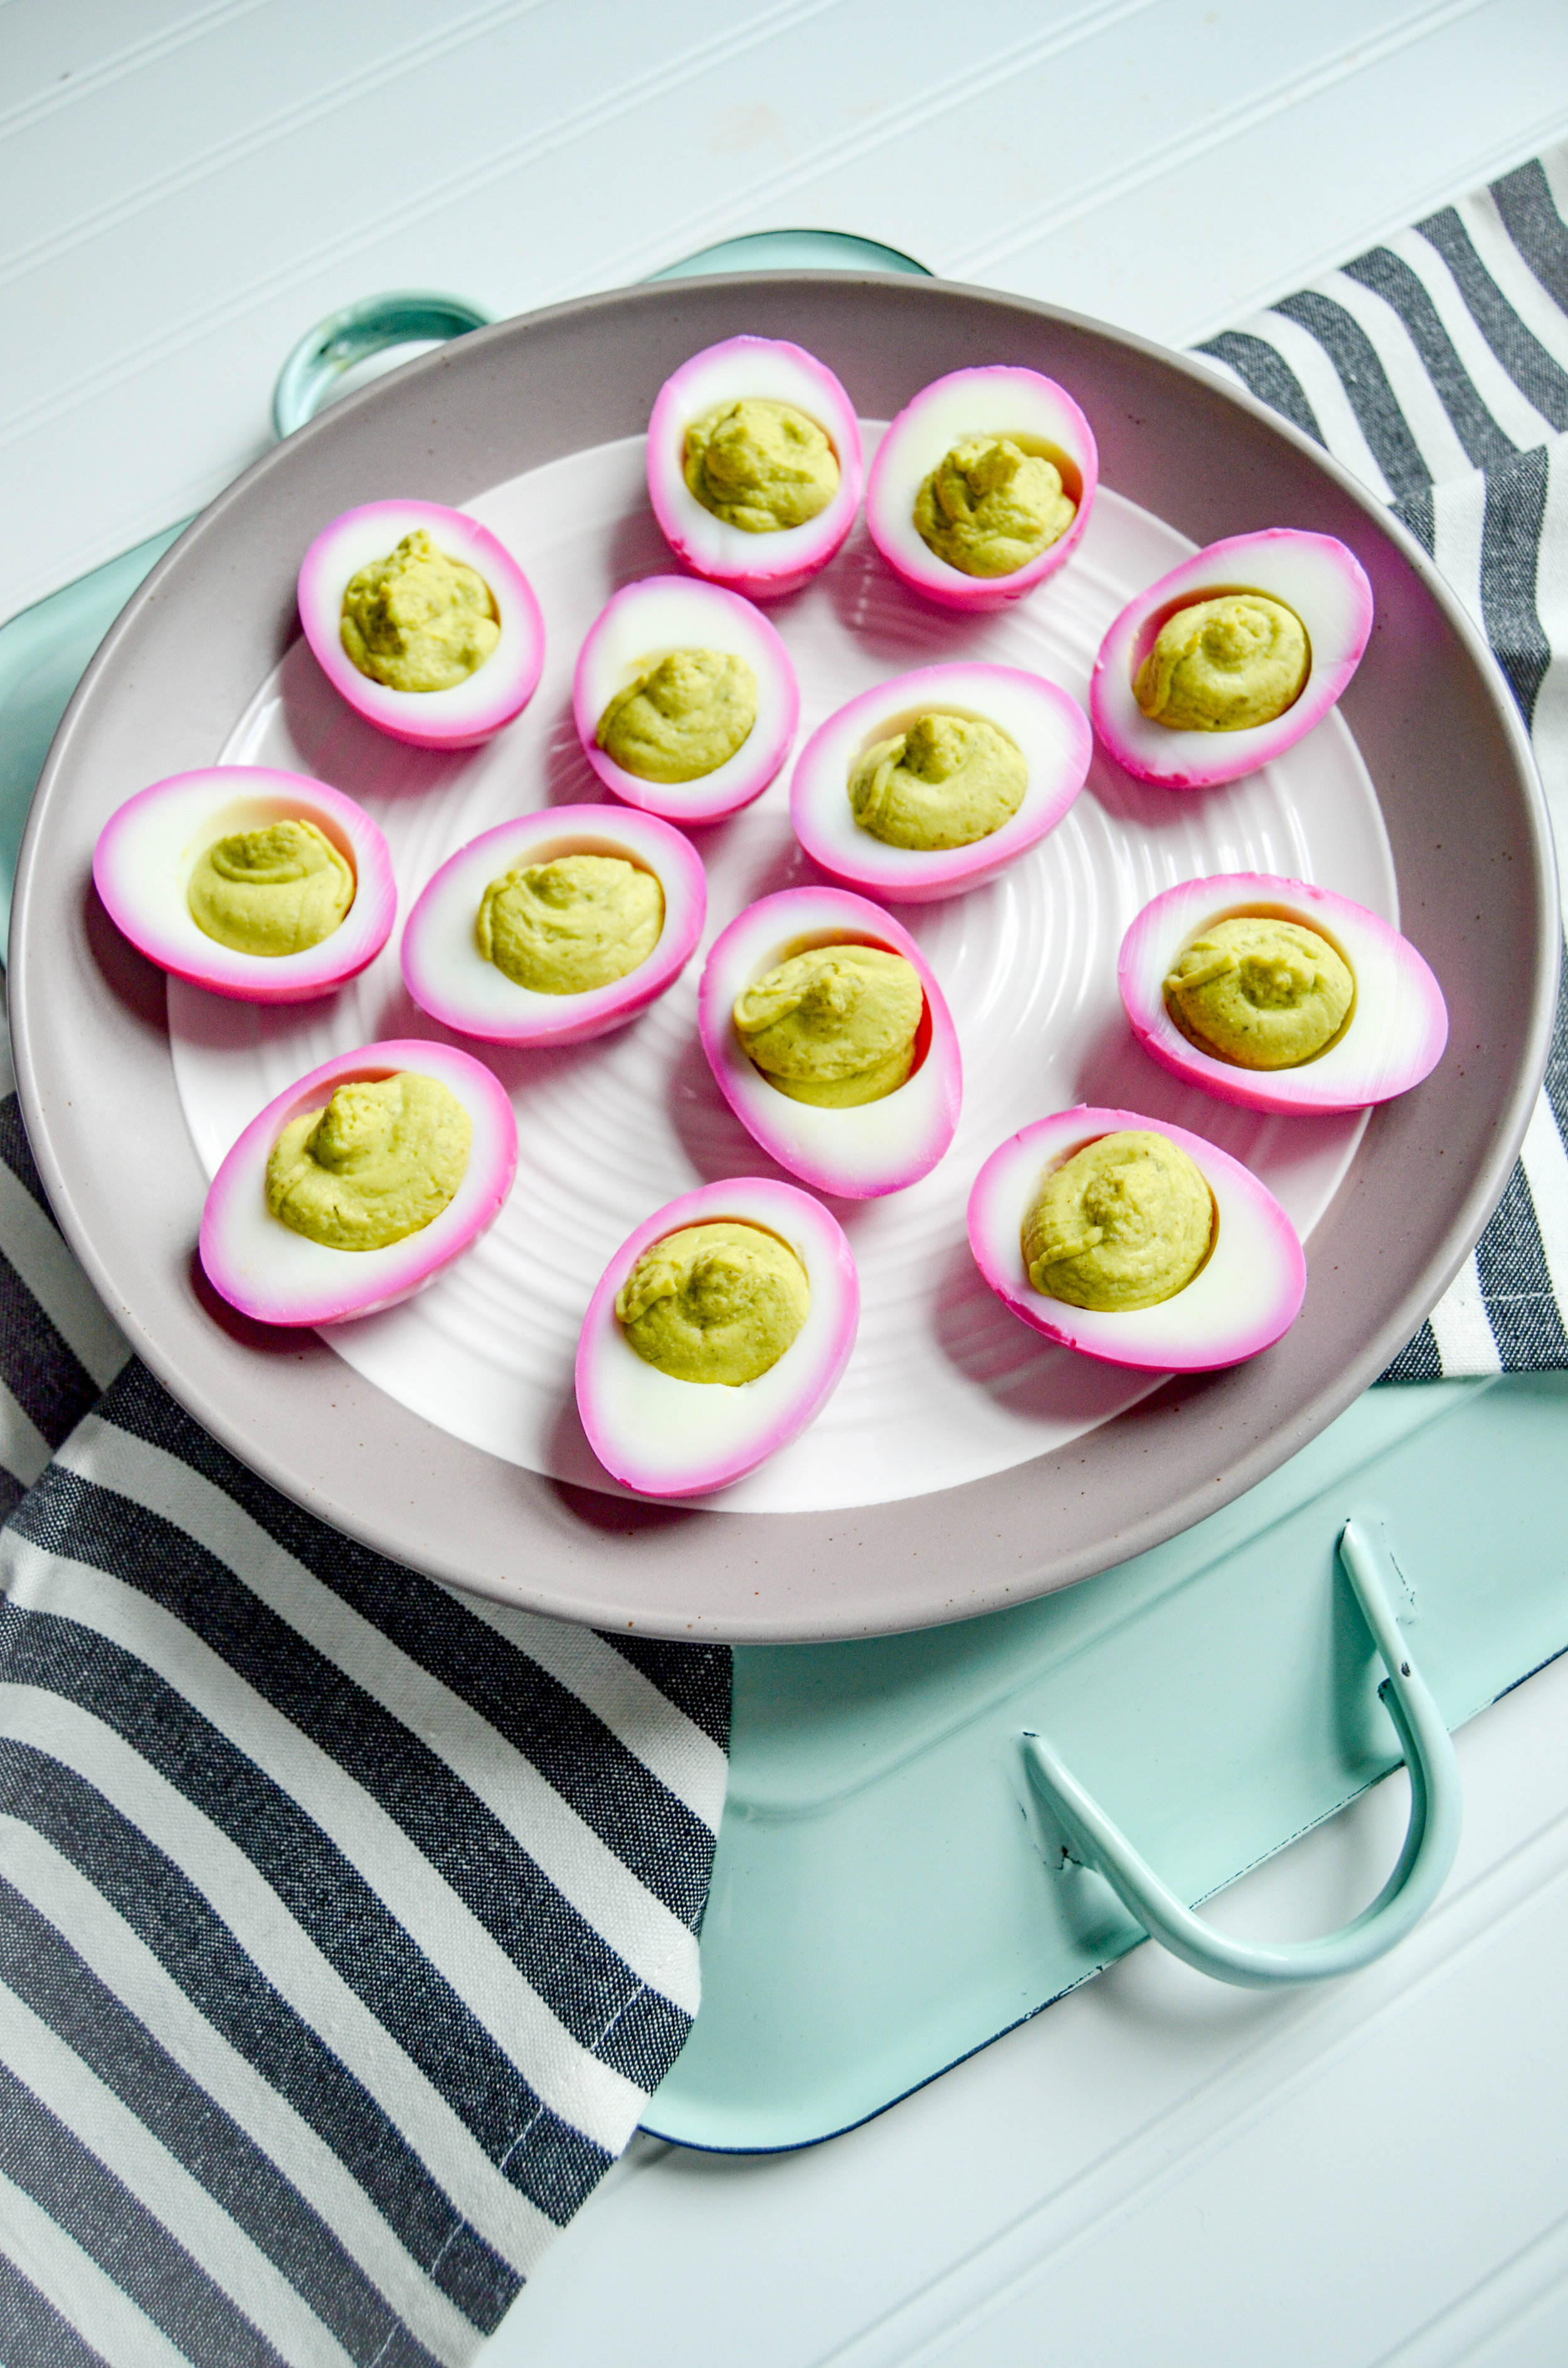
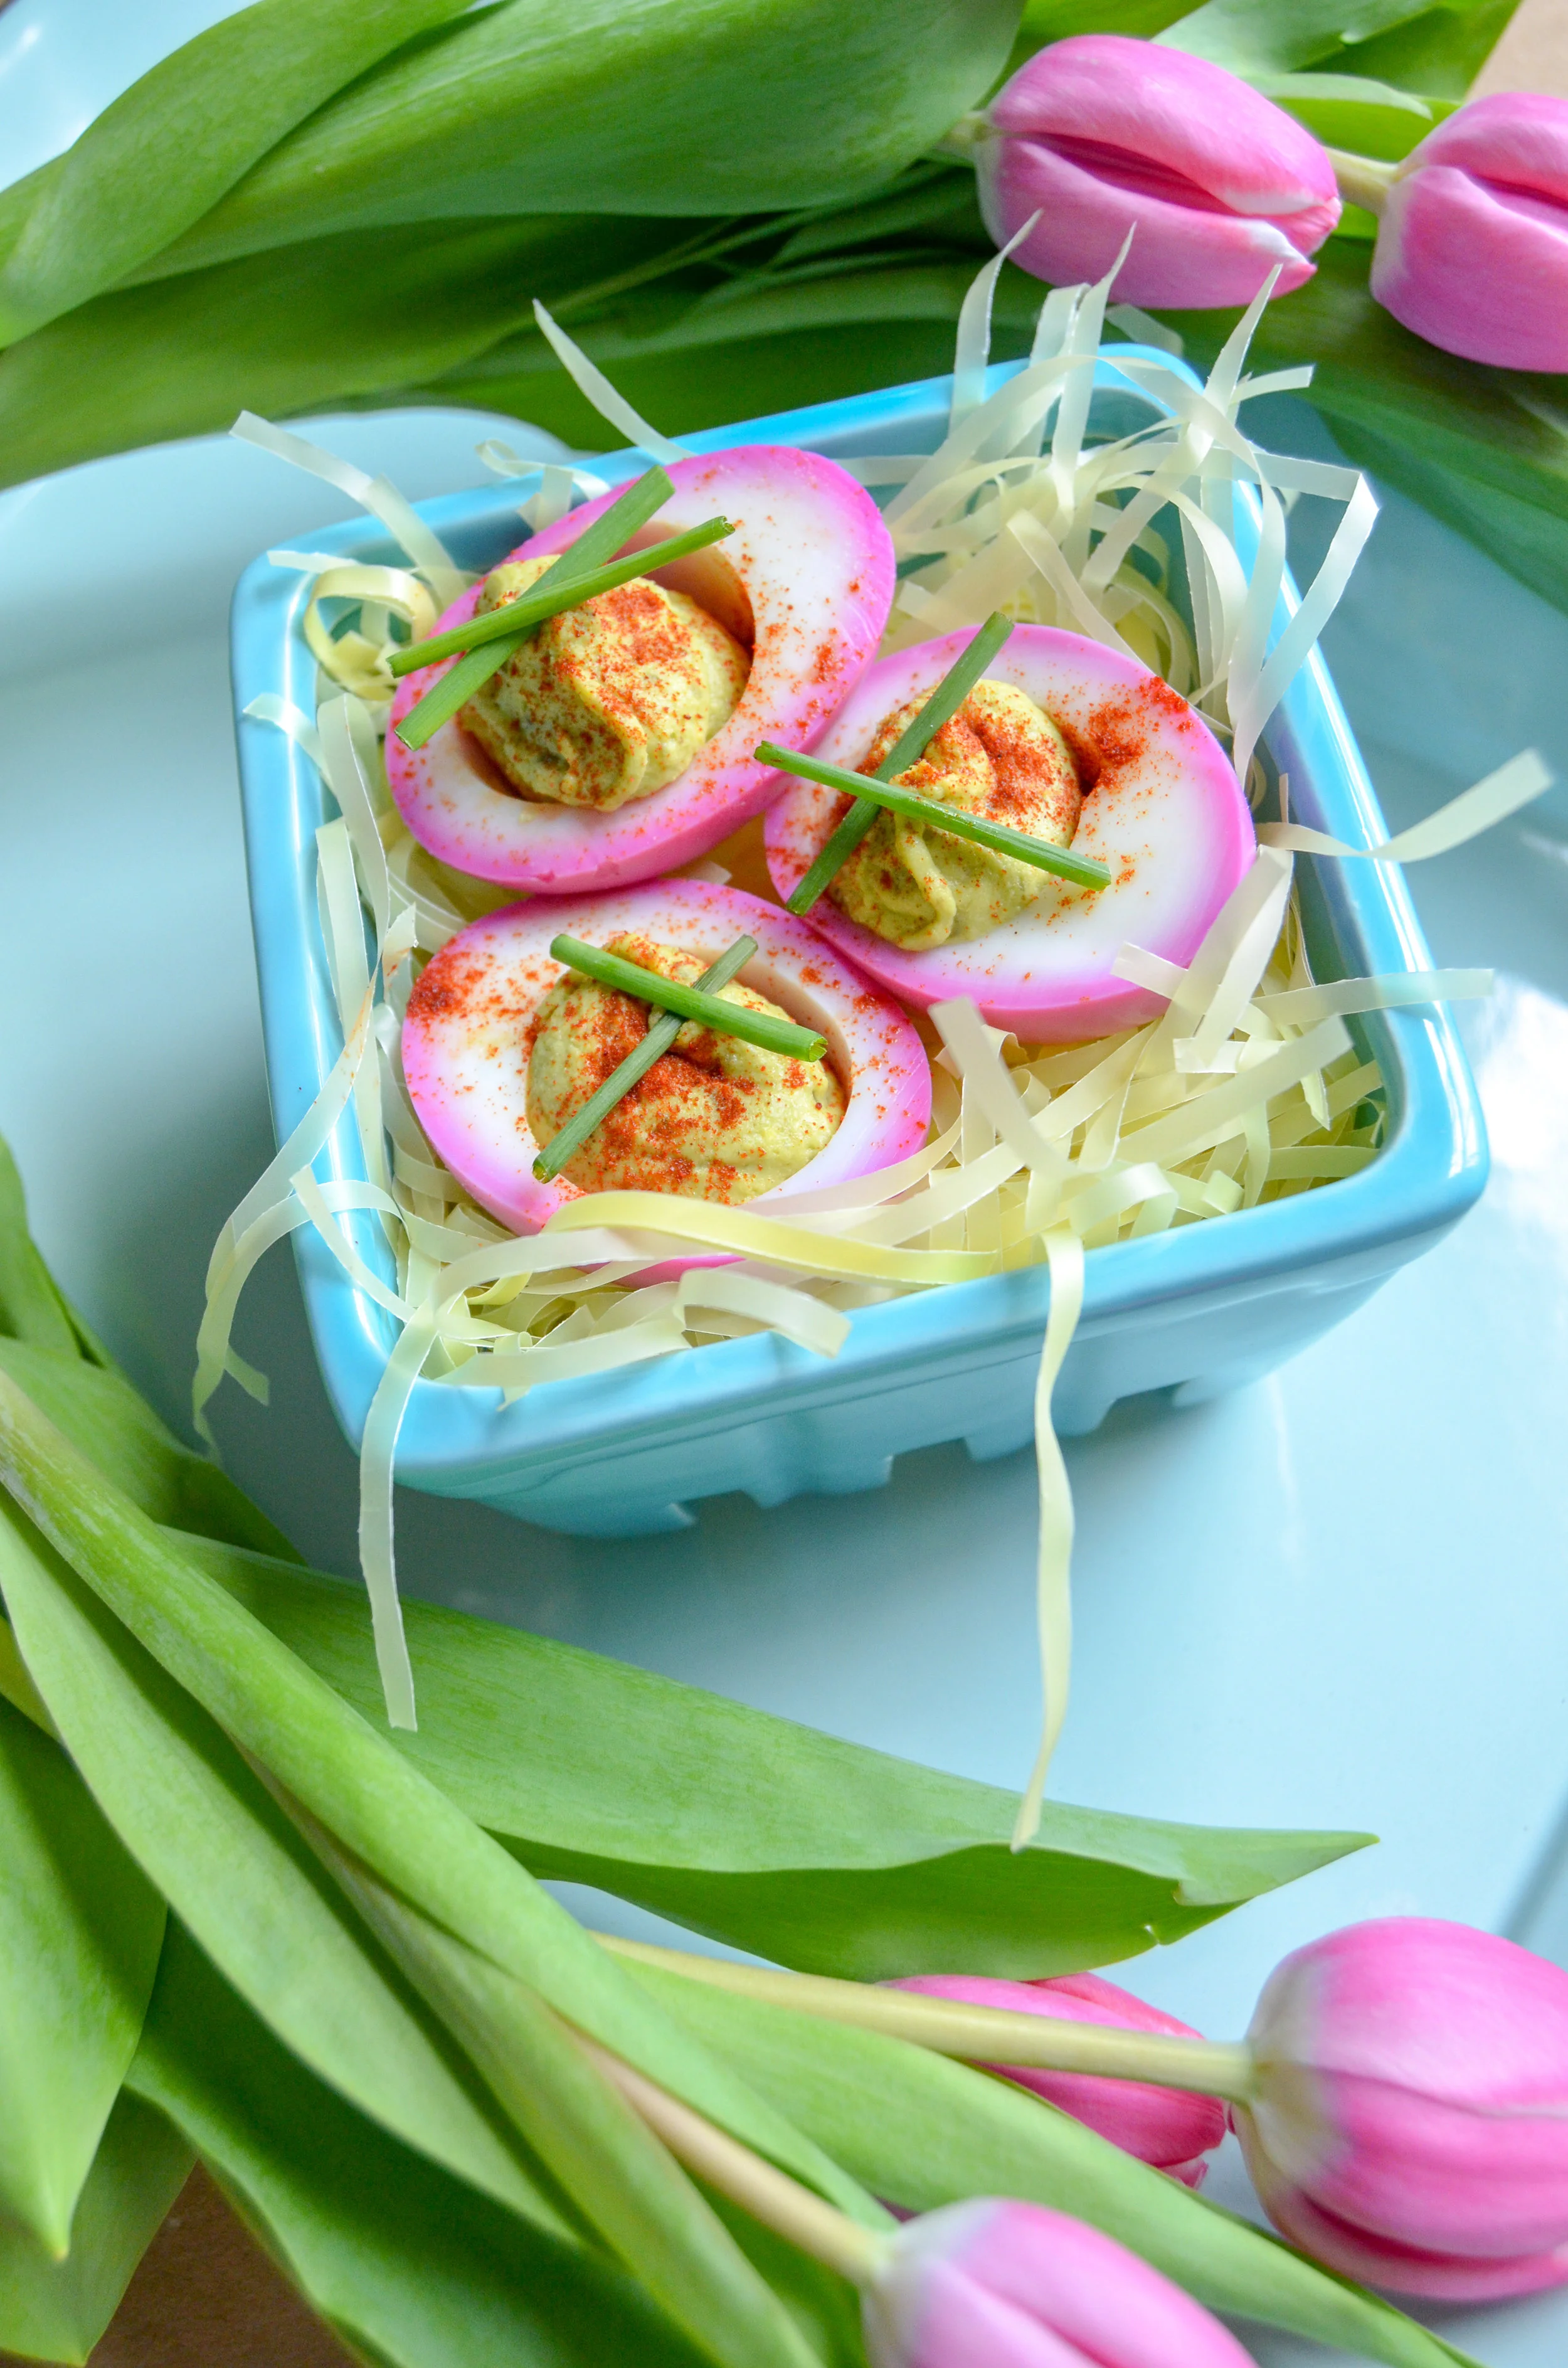
Avocado Deviled Eggs
They’re perfect for Easter or for an upgraded snack. Sprinkle with chives or dill and smoked paprika for garnish!
Growing up as a child, my mother would make deviled eggs for every occasion; Christmas, Easter, you name it! But since I live in a different state from her, it looks like it's up to me to continue the tradition in my home! This recipe will be similar to my mother’s recipe but tweaked so it’s healthier for you.
Made with avocado instead of mayonnaise, these healthy avocado deviled eggs are just as creamy and delicious without the guilt.

They’re perfect for Easter or for an upgraded snack. Sprinkle with chives or dill and smoked paprika for garnish!

Growing up as a child, my mother would make deviled eggs for every occasion; Christmas, Easter, you name it! But since I live in a different state from her, it looks like it's up to me to continue the tradition in my home! This recipe will be similar to my mother’s recipe but tweaked so it’s healthier for you.

Eggs can get a bad reputation with the fat content but eggs actually contain healthy fats that are essential to overall health. Eggs are also a great source of protein as one whole egg contains six grams of protein. They are great from a culinary standpoint to help emulsify sauces or dressings and important in baking to add structure, leavening, and to enhance flavor.
Speaking of healthy fats, a great whole food alternative to mayonnaise is using avocado instead! An avocado provides just a quarter of the calories mayo does along with healthy fats, fiber, and important vitamins like folate and Vitamin C.

Since I absolutely love deviled eggs, I thought I would kick up the game a little bit. You can completely omit this part (why would you!?) but these eggs are beet-dyed! Dying the eggs are merely for presentation. The beet dying process does not affect flavor at all! If you would like to give your eggs this pretty color, check out the Created by Diane blog post on beet dying. I followed her foolproof method but used the juice from my Refrigerator Pickled Beets recipe instead, to cut out some steps.


Enjoy these not so devilish eggs as a quick protein snack or as an appetizer to share this Easter holiday, picnic or barbecue.
If you try this recipe, let us know! Leave a comment, rate it, and don’t forget to tag a photo with #fromtherootsblog on Instagram. We love seeing what you come up with!
Made with avocado instead of mayonnaise, these healthy avocado deviled eggs are just as creamy and delicious without the guilt.
INGREDIENTS
1 dozen, 12 fresh eggs
1 large ripe avocado
2 Tbsp minced sweet pickles (bread and butter pickles or gherkins)
2 Tbsp dijon mustard
1/2 tsp celery salt
1/4 tsp garlic powder
Garnish
smoked paprika, chives or fresh dill
DIRECTIONS
To hard boil the eggs: Place 12 eggs in a large saucepan with cold water until eggs are fully covered. Set the oven on medium heat and let the water boil gradually (this prevents the eggs from cracking if set on high). Once boiling, cover with a lid and sit on the back burner for about 11-13 min (depending on the size of your egg). When the eggs are cooked, immediately transfer eggs to an ice cold water bath to stop the cooking process. Gently crack shells to remove the egg.
To beet dye eggs: Place de-shelled eggs in a large ziploc bag and place bag in a bowl to keep the ziploc bag upright. Pour beet juice from (pickled beets recipe) and dilute with water until all eggs are covered. (or use beet mixture from (Created by Diane). Place in fridge for at least 1 hour. Rinse the beet juice off the eggs using a strainer and pat dry
Slice eggs in half and remove eggs yolks saving 4 egg yolks (8 halves) and add to a bowl. Discard or keep remaining yolks for another dish.
For this filling: add avocado, pickles, dijon mustard and seasonings to the bowl with yolks and mash until fully incorporated. Adjust seasonings to taste. It is best to use the back of a fork for easy mashing.
To serve: place filling in a ziploc bag and cut one corner to squeeze the filling into the hollowed part of the egg. Sprinkle with smoked paprika and top with chopped fresh chives or dill.
Store in an airtight container for up to 1 week and enjoy!
NOTES
The egg and avocado mixture should fill exactly 24 halved eggs but just in case you might have used a small avocado, add more egg yolk to the mixture to ensure you have enough filling for 24 halved eggs.
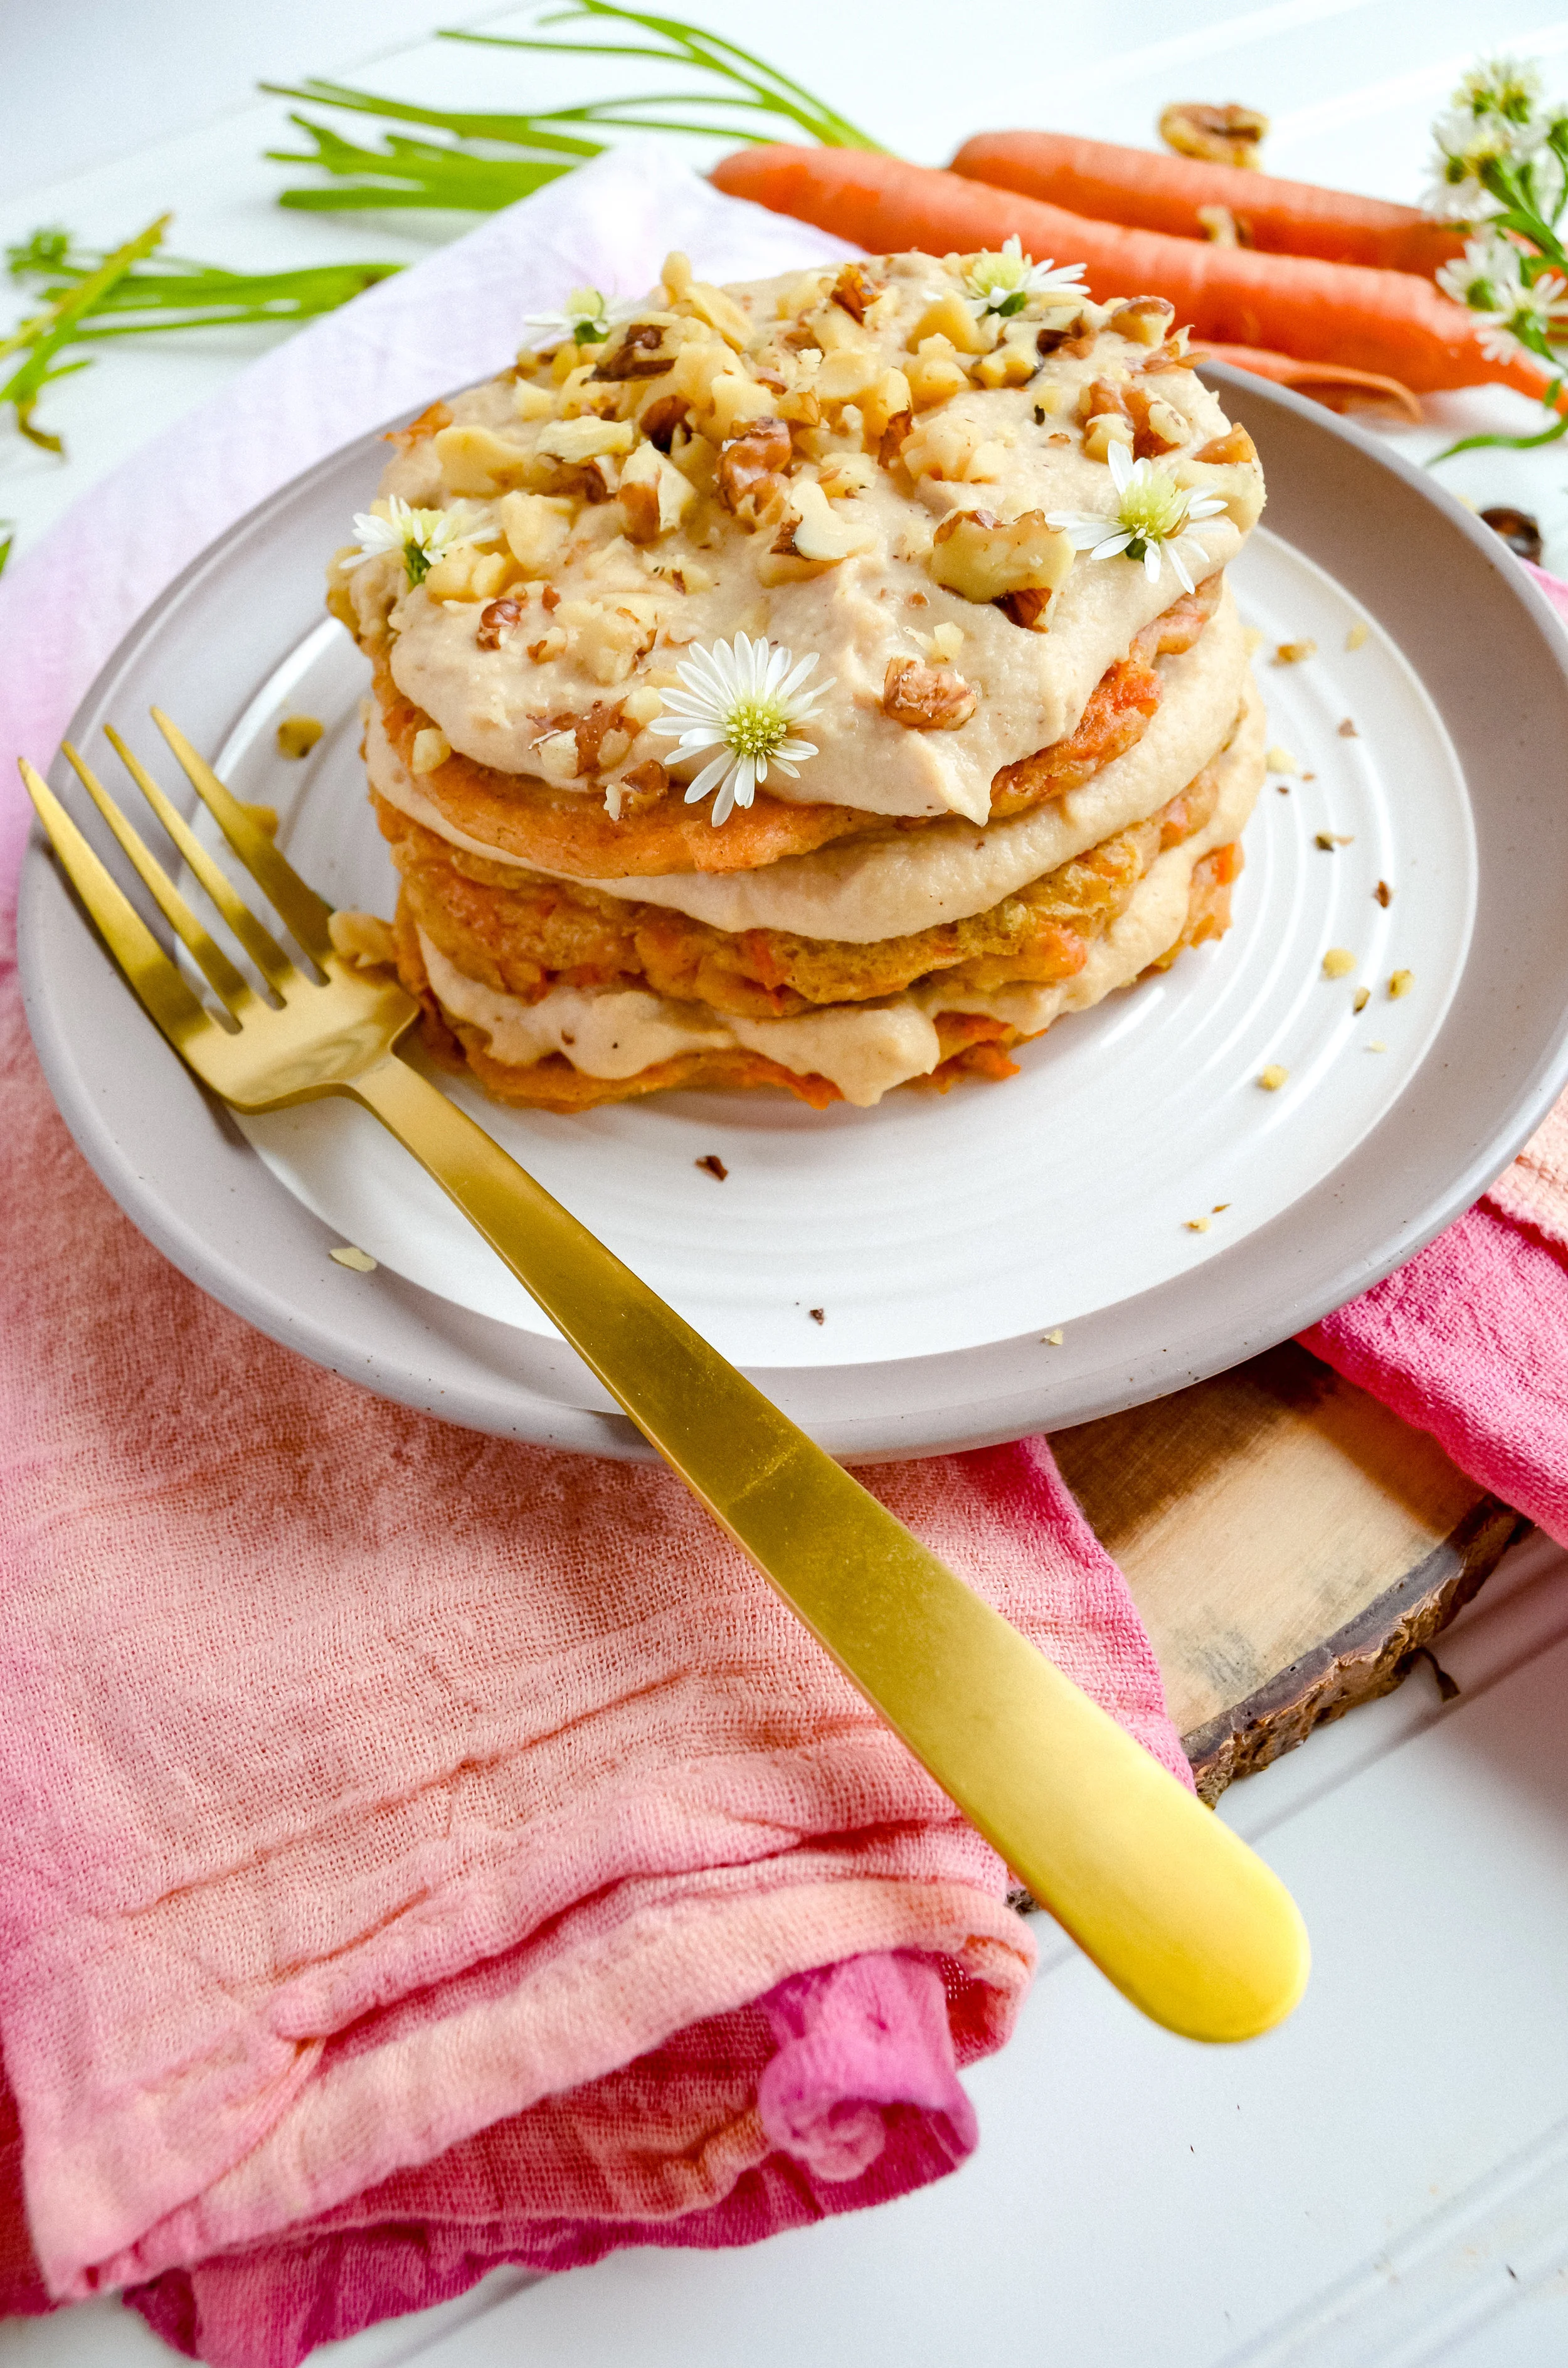
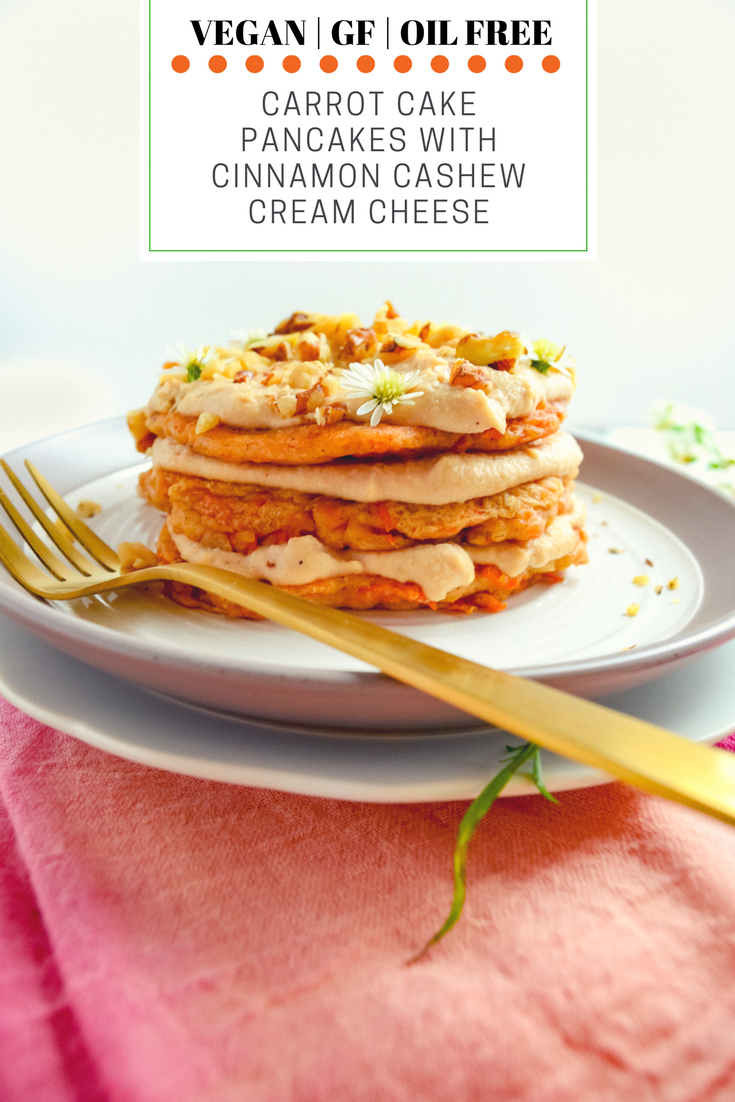
Carrot Cake Pancakes with Cinnamon Cashew Cream Cheese
Carrot cake has got to be in my top 5 favorite cakes.
From the spices of cinnamon and nutmeg to the textures of walnuts and carrots, there is nothing that will stand in the way of me and carrot cake.
Nothing.
A healthy take on the classic carrot cake, made into pancakes that are sure to please everyone! I pair it with an irresistible cinnamon cashew cream cheese that you can’t help but lick right out of the bowl! Best of all, these pancakes are oil-free, gluten-free, and entirely vegan.
Carrot cake has got to be in my top 5 favorite cakes.
From the spices of cinnamon and nutmeg to the textures of walnuts and carrots, there is nothing that will stand in the way of me and carrot cake.
Nothing.
That is why I have decided to try and incorporate carrot cake into my life in an innovative and healthy way. Now that I’m getting older, I am more aware of how many sticks of butter it takes to achieve the perfect taste of carrot cake. After experimenting, I have found a way to not only indulge my desires completely guilt-free but to also do it for breakfast.
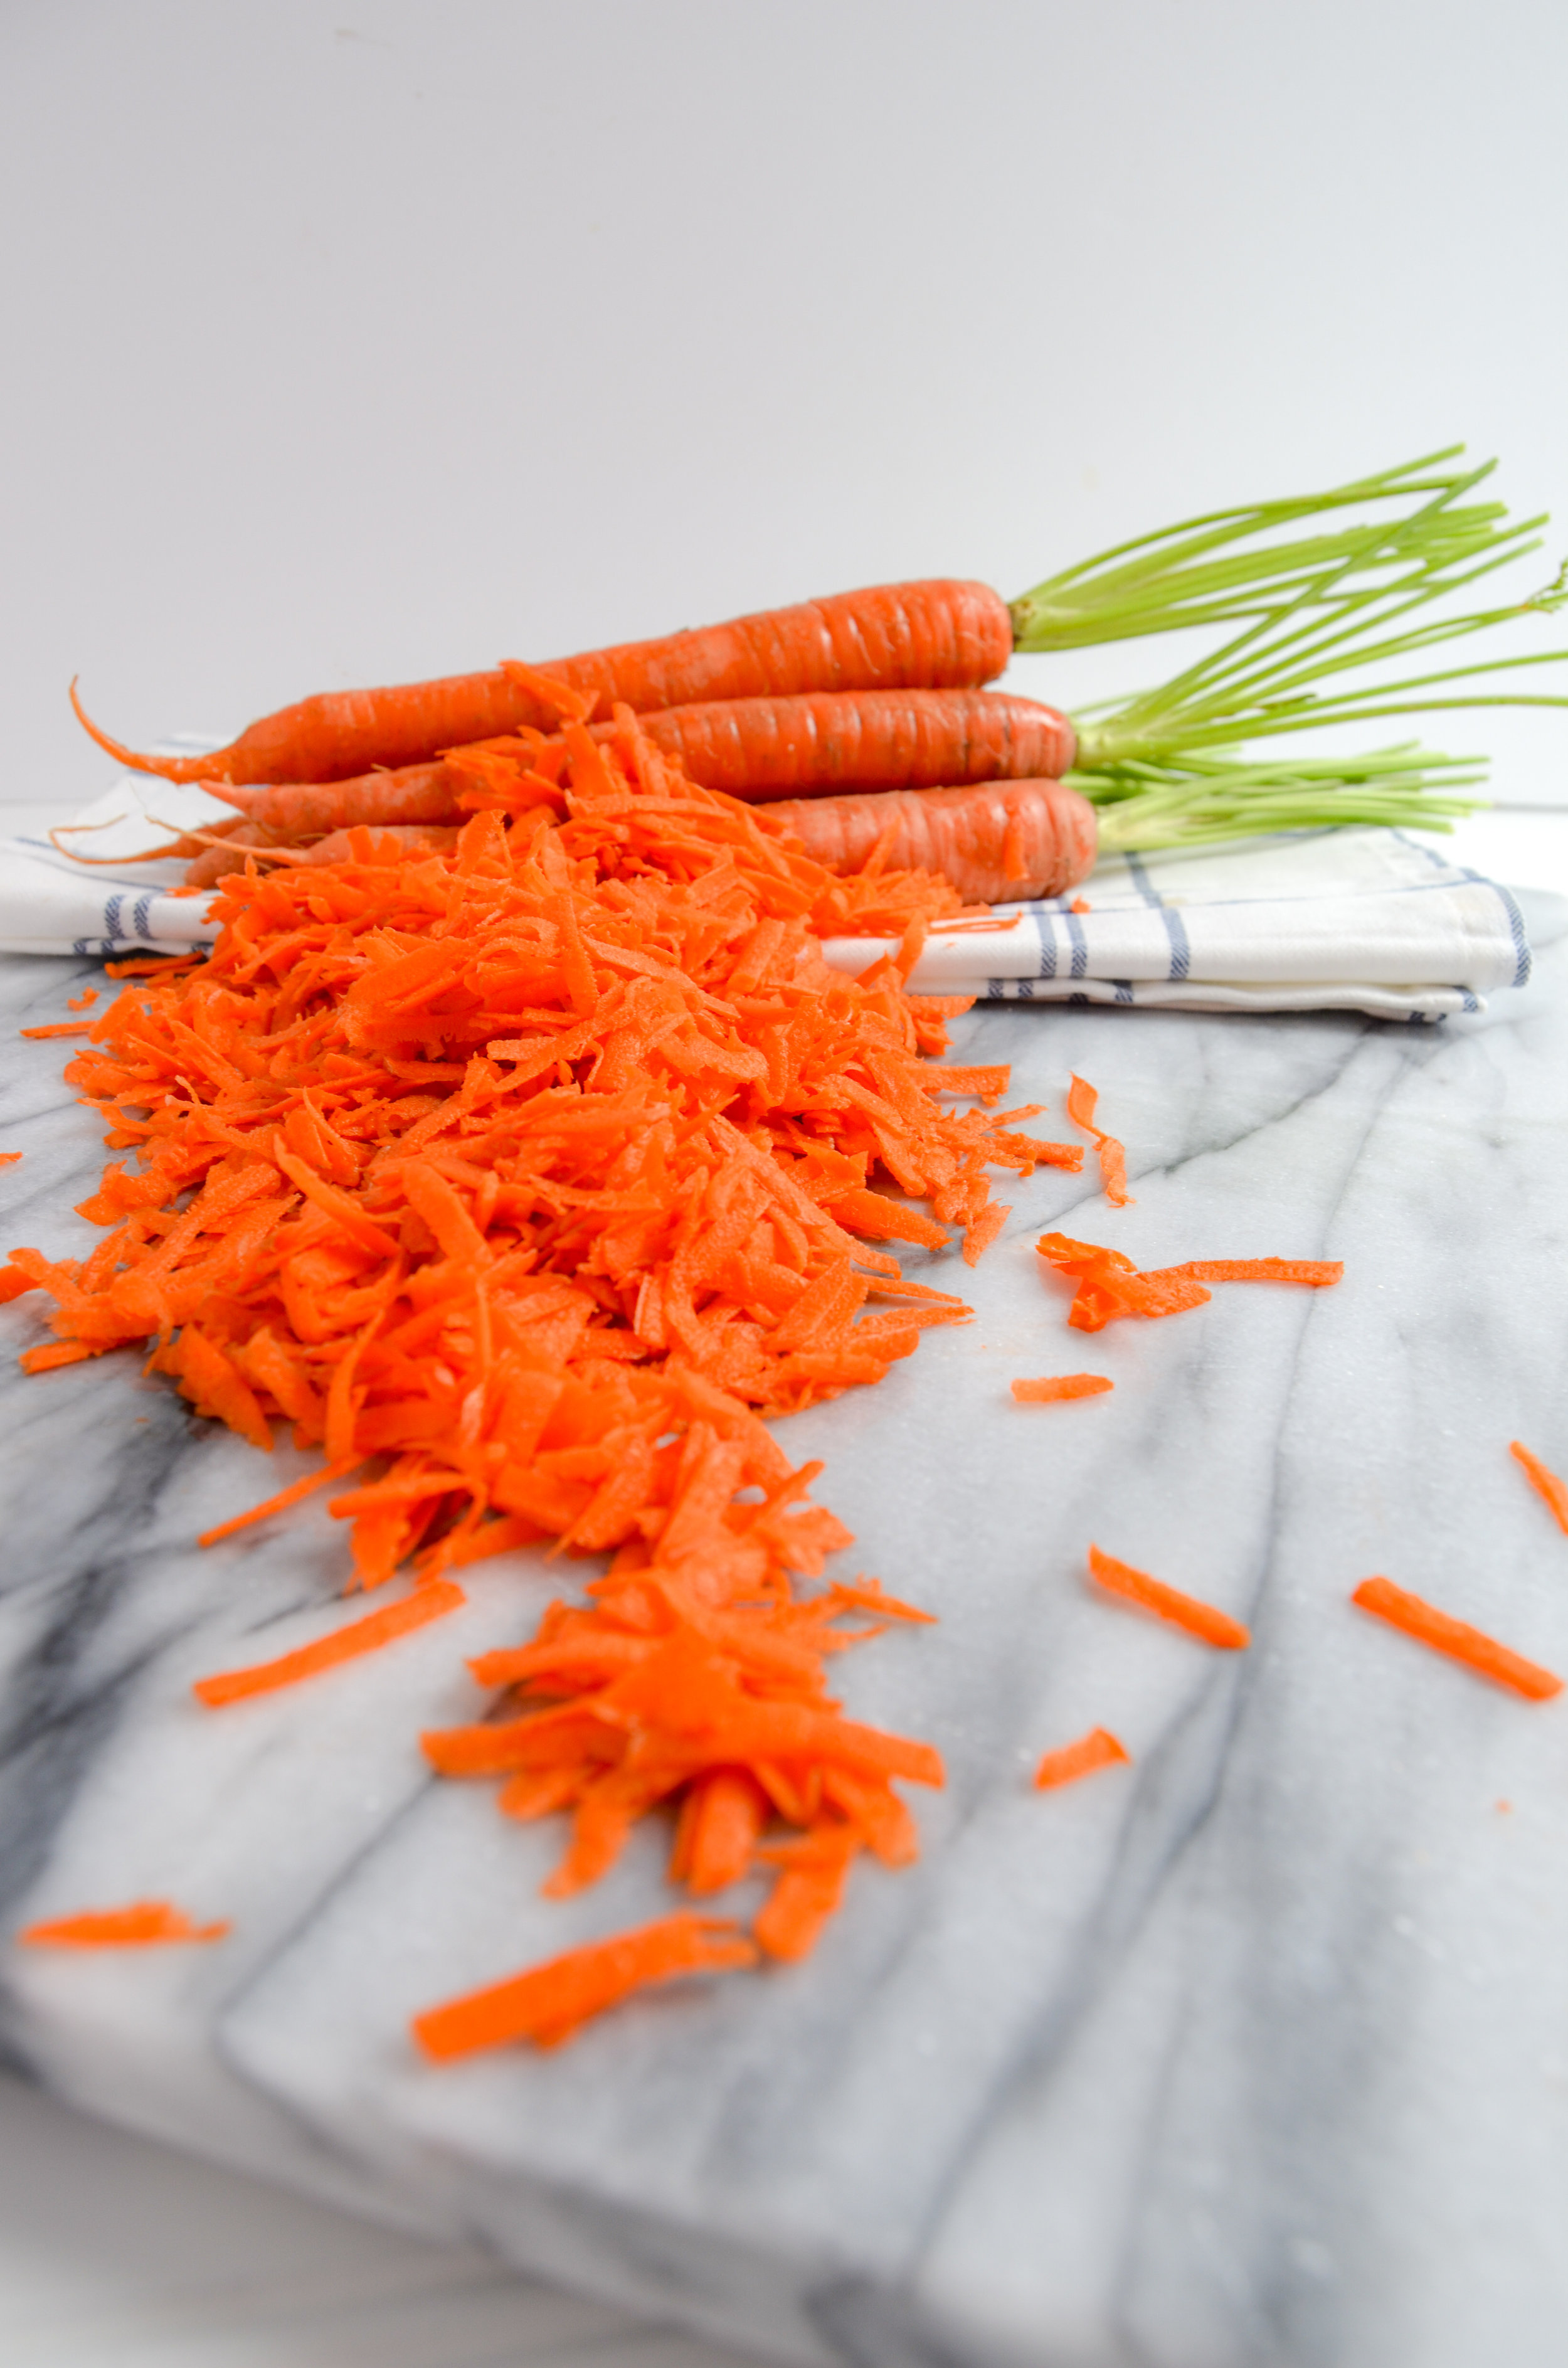
You’ll need a few key ingredients for that classic carrot cake taste, such as carrots, of course! I prefer starting with fresh carrots so I can medium grate them to get more of a crunchy texture, but if you prefer to have a well-blended batter then you can finely grate your carrots or put them in a processor. Be sure to pat your grated carrots with paper towels or a kitchen towel to absorb excess liquid so it doesn’t make your batter too liquidy.

Another key ingredient is the spices. Now, you can go about this either two ways: You can mix a ratio of cinnamon, ginger, and nutmeg, or you can simply use a pumpkin pie spice mix. Both seem equal in flavor, I just had leftover pumpkin pie spice from the fall days and I basically use it in all my pancake batters!

Prepping for the pancake batter is a breeze. Just add your dry ingredients to your wet ingredients and then use a spatula to fold in the walnuts and grated carrots. It is important that you let your batter rest for at least 10 minutes so that the starch molecules in the flour can absorb the liquid in the batter. This causes them to swell and gives the batter a thicker, more viscous consistency. This allows time for the air bubbles to slowly work their way out.

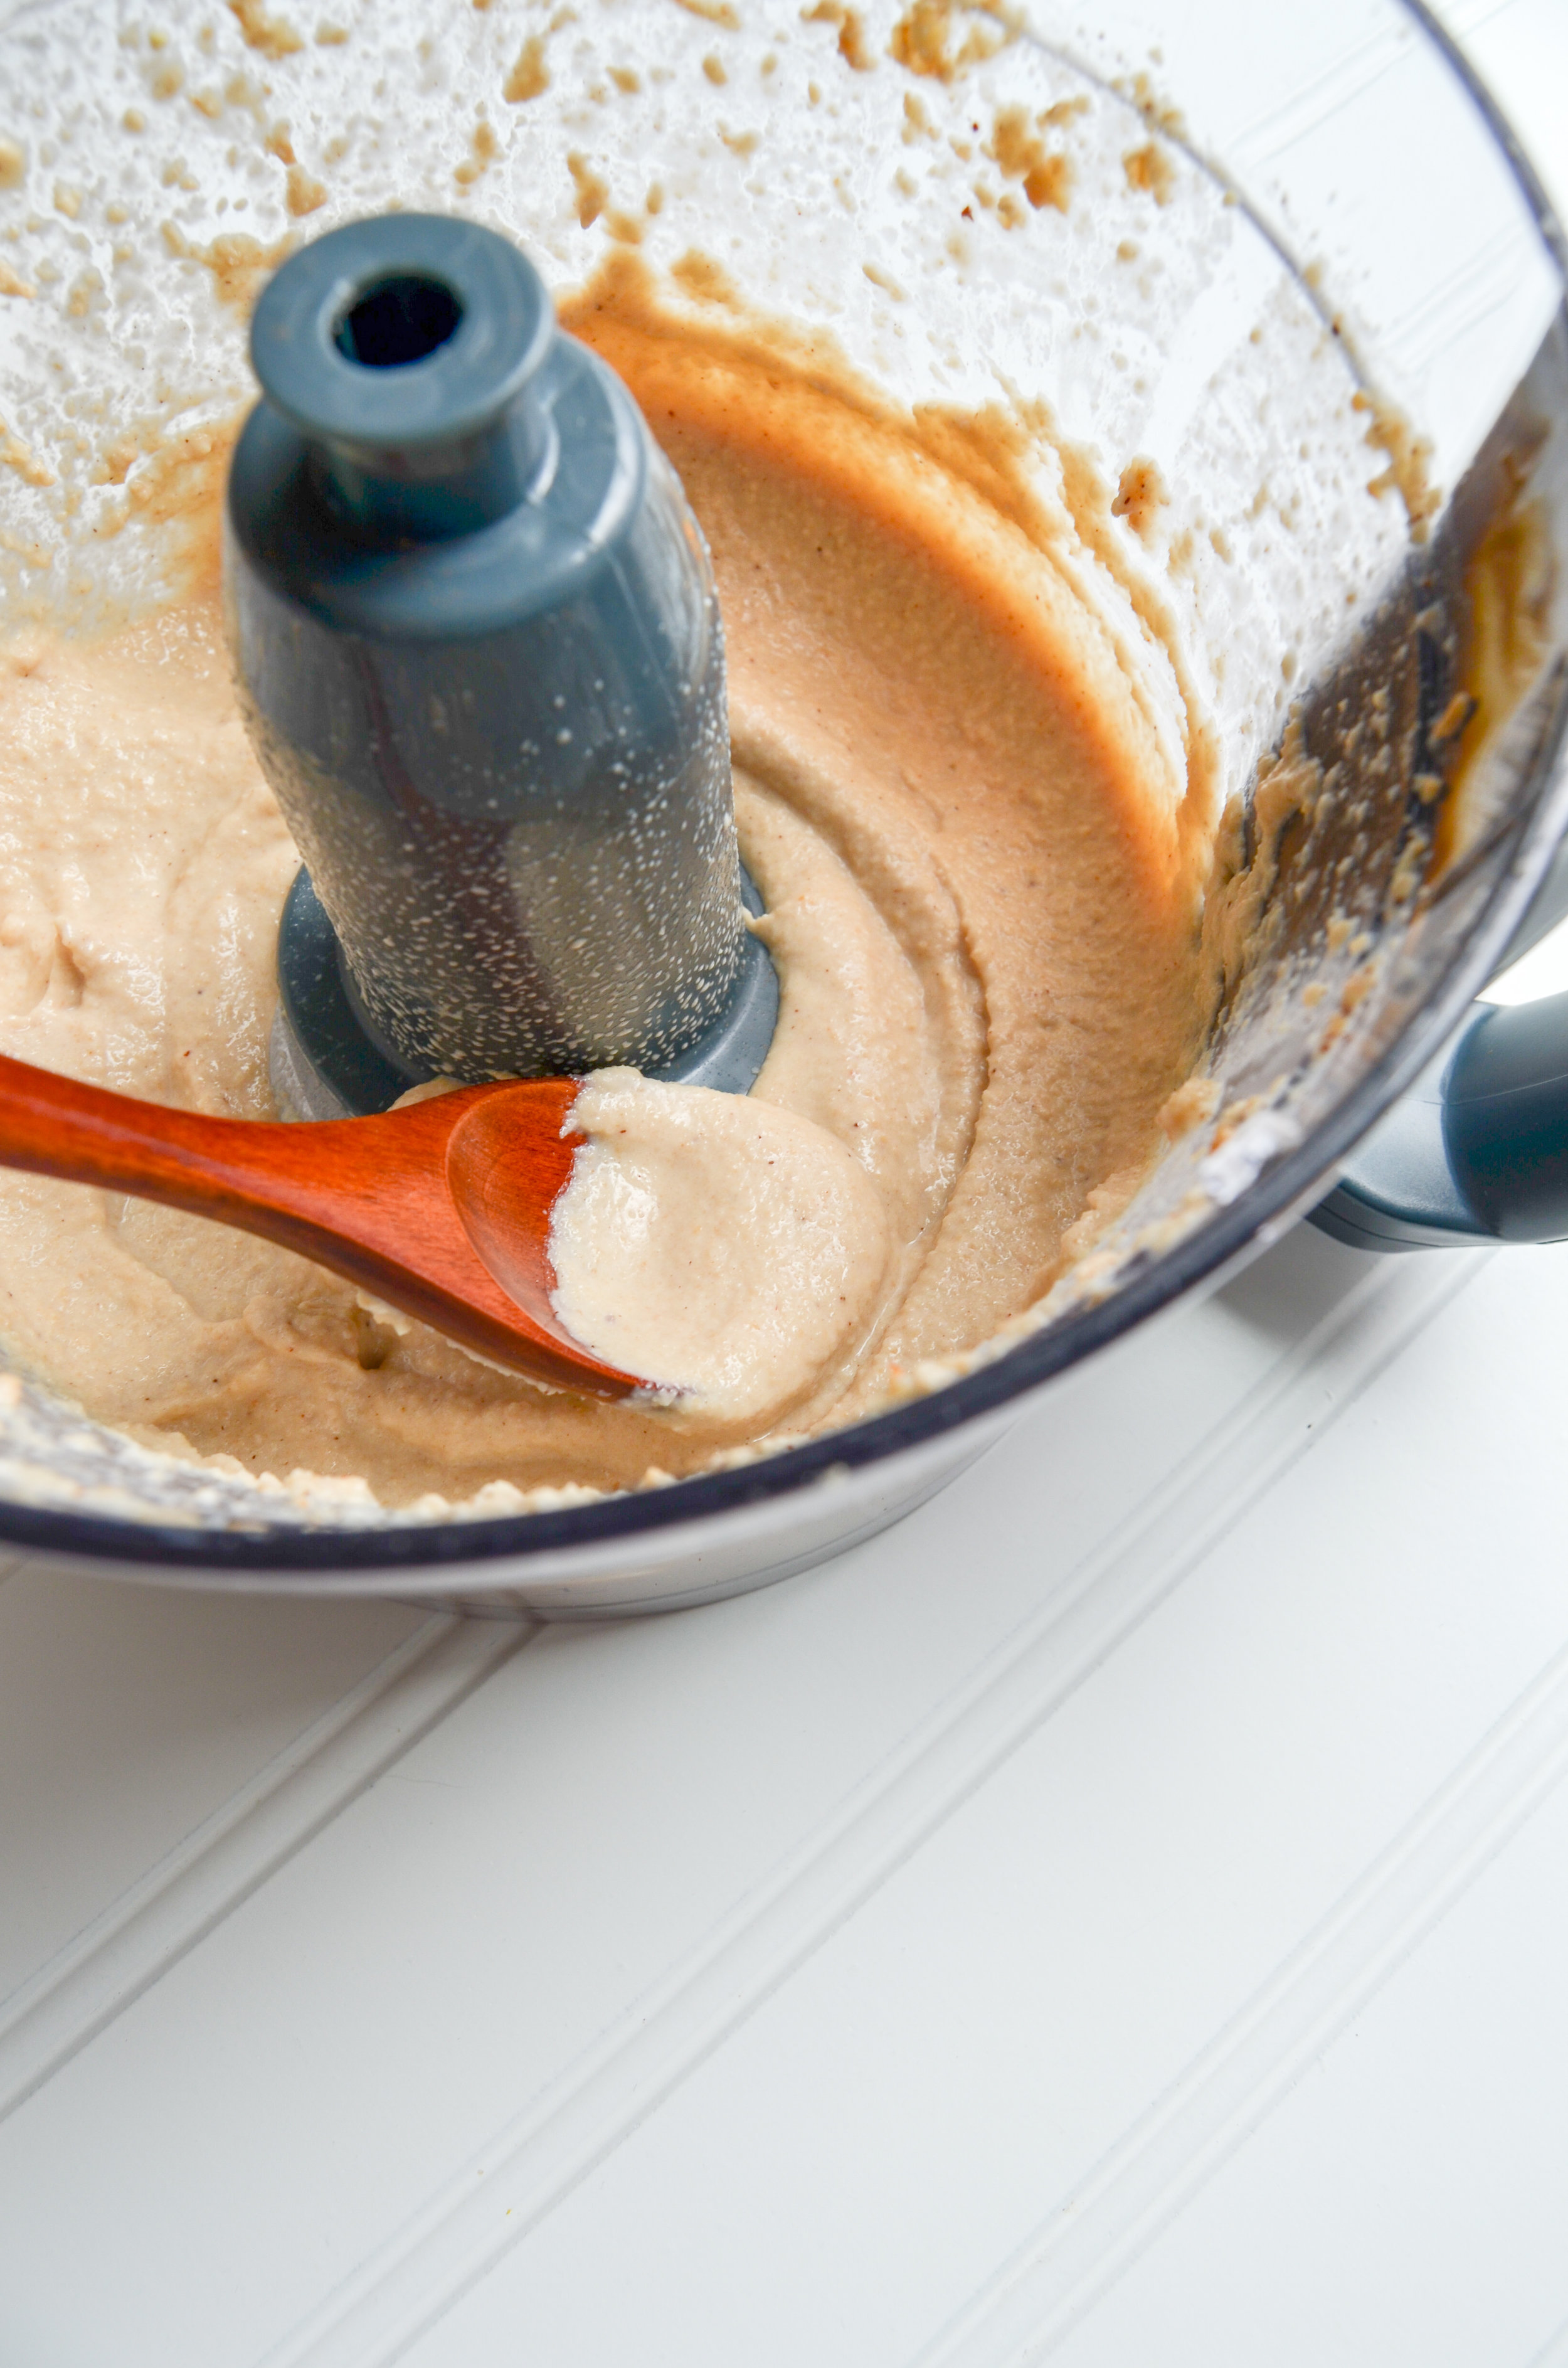
Now, onto my favorite part… The cinnamon cashew cream cheese! It really takes the cake in this recipe (no pun intended)! The cashew cream cheese tastes almost like confectioners sugar to me. It has the perfect amount of sweetness thanks to the pure maple syrup. It’s so addicting that I will literally make an extra batch of this and sneak it in the fridge to take a spoonful (or three) out of the jar when I need to satisfy my sweet tooth!
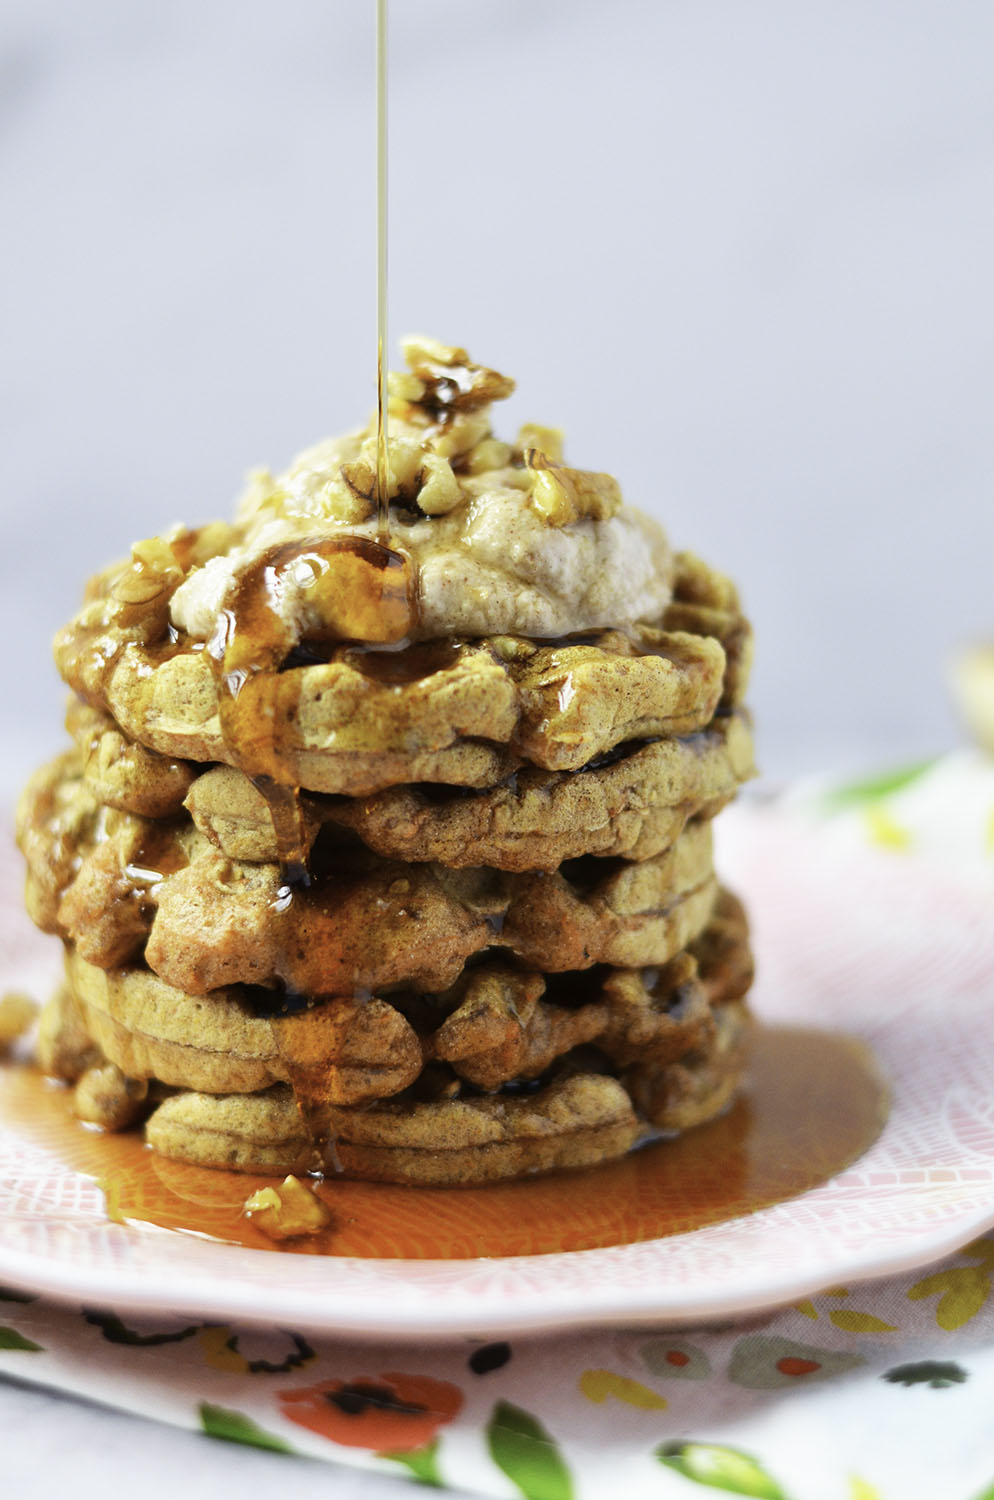
*Updated - You can make this recipe into waffles! (notes below)
If you try this recipe, let us know! Leave a comment, rate it, and don’t forget to tag a photo with #fromtherootsblog on Instagram. We love seeing what you come up with!
Vegan, gluten free and oil free take on a classic carrot cake pancake that is sure to please everyone! Paired with an irresistible cinnamon cashew cream cheese that you can’t help but lick right out of the bowl!
INGREDIENTS
Carrot Cake Pancakes
1/2 cup chopped raw walnuts
1 cup (loosely packed) shredded carrots ((2 medium carrots))
1 cup non dairy milk ((I used unsweetened almond milk))
1 tsp baking powder
1/2 tsp baking soda
2 tsp pumpkin pie spice mix or (2 tsp cinnamon, 1/2 tsp ginger and 1/4 tsp ground nutmeg)
1/4 cup applesauce unsweetened
1 tsp vanilla extract
1/2 cup almond flour (not almond meal)
1 cup GF baking flour
1 Tbsp sweetener of choice (I used pure maple syrup)
Dash of salt
Cinnamon Cashew Cream Cheese
3/4 cup raw cashews drained (soaked overnight with warm water)
1 1/2 Tbsp pure maple syrup
1/4 cup non dairy milk (I used unsweetened almond milk)
squeeze of small lemon wedge
1/2 tsp cinnamon
DIRECTIONS
To prepare the batter, in a medium bowl, add both flours, baking powder, baking soda, spices, and a dash of salt. In a separate bowl, add applesauce, milk, vanilla, and sweetener and mix until combined. Add your dry ingredients to your liquid ingredients and mix until combined.
Gently fold in the walnuts and carrots and let the batter sit for at least 10 minutes.
Lightly coat your skillet with vegan butter or coconut oil over medium heat. When the skillet is hot, add about ¼ cup of the pancake mixture to the pan. Cook for 2-3 min or until the bottom of the pancake is brown and bubbles have formed on the outside. Flip and cook for 2-3 min or until brown and fully cooked through.
While pancakes are cooking, add cashews, maple syrup, milk, lemon and cinnamon to a processor and pulse on high for about 4 minutes or until mixture is smooth and creamy in texture. Add additional maple syrup for a sweeter taste.
Layer pancakes with cream cheese and top with walnuts and maple syrup!
Make sure to grease your skillet in between batches as well as to keep a consistent strain of heat. If you let your skillet get too hot, then the pancakes will be crispy and brown on the outside but mushy and raw on the inside.
Since the pancakes are vegan, an egg is not present, so let your batter rest is key to get that perfect fluffy texture.
If you are short on time, you can actually boil the cashews! Just cover cashews with water in a small saucepan and boil over medium-high heat. As soon as the water boils, turn the oven off and let the cashews sit in the saucepan covered for 1 hour.
NOTES
Ingredients trusted brands: GF Baking Flour, Almond Flour, and Pumpkin Pie Spice
Can be easily made into waffles! If eggs are not an issue, I would recommend substituting applesauce for 1 egg and omitting almond flour.

Sweet Potato Hash Breakfast Skillet
Breakfast skillets are my go-to when I’m looking for an easy, early morning meal (or for any time of the day -- I’m a fan of breakfast for dinner!). In this recipe, I use a sweet potato hash that creates a flexible foundation for a breakfast skillet that you can customize to your liking. Whether you need to plan an unexpected breakfast brunch, or just want an easy no-fuss meal, this recipe caters to you! Ingredients in this recipe can easily be changed out with your favorite veggies. Sometimes, I’ll resort to this recipe when I want to clear out my fridge and use leftover ingredients. So, let’s get to cooking!
This breakfast skillet with andouille sausage and eggs is a filling, savory, healthy meal for any time of day!


Breakfast skillets are my go-to when I’m looking for an easy, early morning meal (or for any time of the day -- I’m a fan of breakfast for dinner!). In this recipe, I use a sweet potato hash that creates a flexible foundation for a breakfast skillet that you can customize to your liking. Whether you need to plan an unexpected breakfast brunch, or just want an easy no-fuss meal, this recipe caters to you! Ingredients in this recipe can easily be changed out with your favorite veggies. Sometimes, I’ll resort to this recipe when I want to clear out my fridge and use leftover ingredients. So, let’s get to cooking!
My sweet potato hash breakfast skillet recipe only takes 30 minutes to make and requires just one skillet with any produce, protein, and eggs you have left in the fridge. At the end of the week, I typically have about a small bunch of fresh spinach left in the bag, ½ of an onion in a sandwich bag lodged in the back of the fridge, as well as stocked grated sweet potato in the freezer.

I start out by cooking the onions and garlic in the skillet to provide a base flavor for the skillet to build upon before adding peppers and protein. In this case, I used green and red peppers and andouille sausage. Once the peppers and sausage have been cooked, I remove them from the skillet so that I can cook the sweet potatoes next. I season the sweet potatoes to perfection then add the cooked ingredients back on top. This is when I add a handful of spinach and mix everything together. Create cute little nest pockets for how many eggs you would like and then pop the skillet in the oven for the final bake.
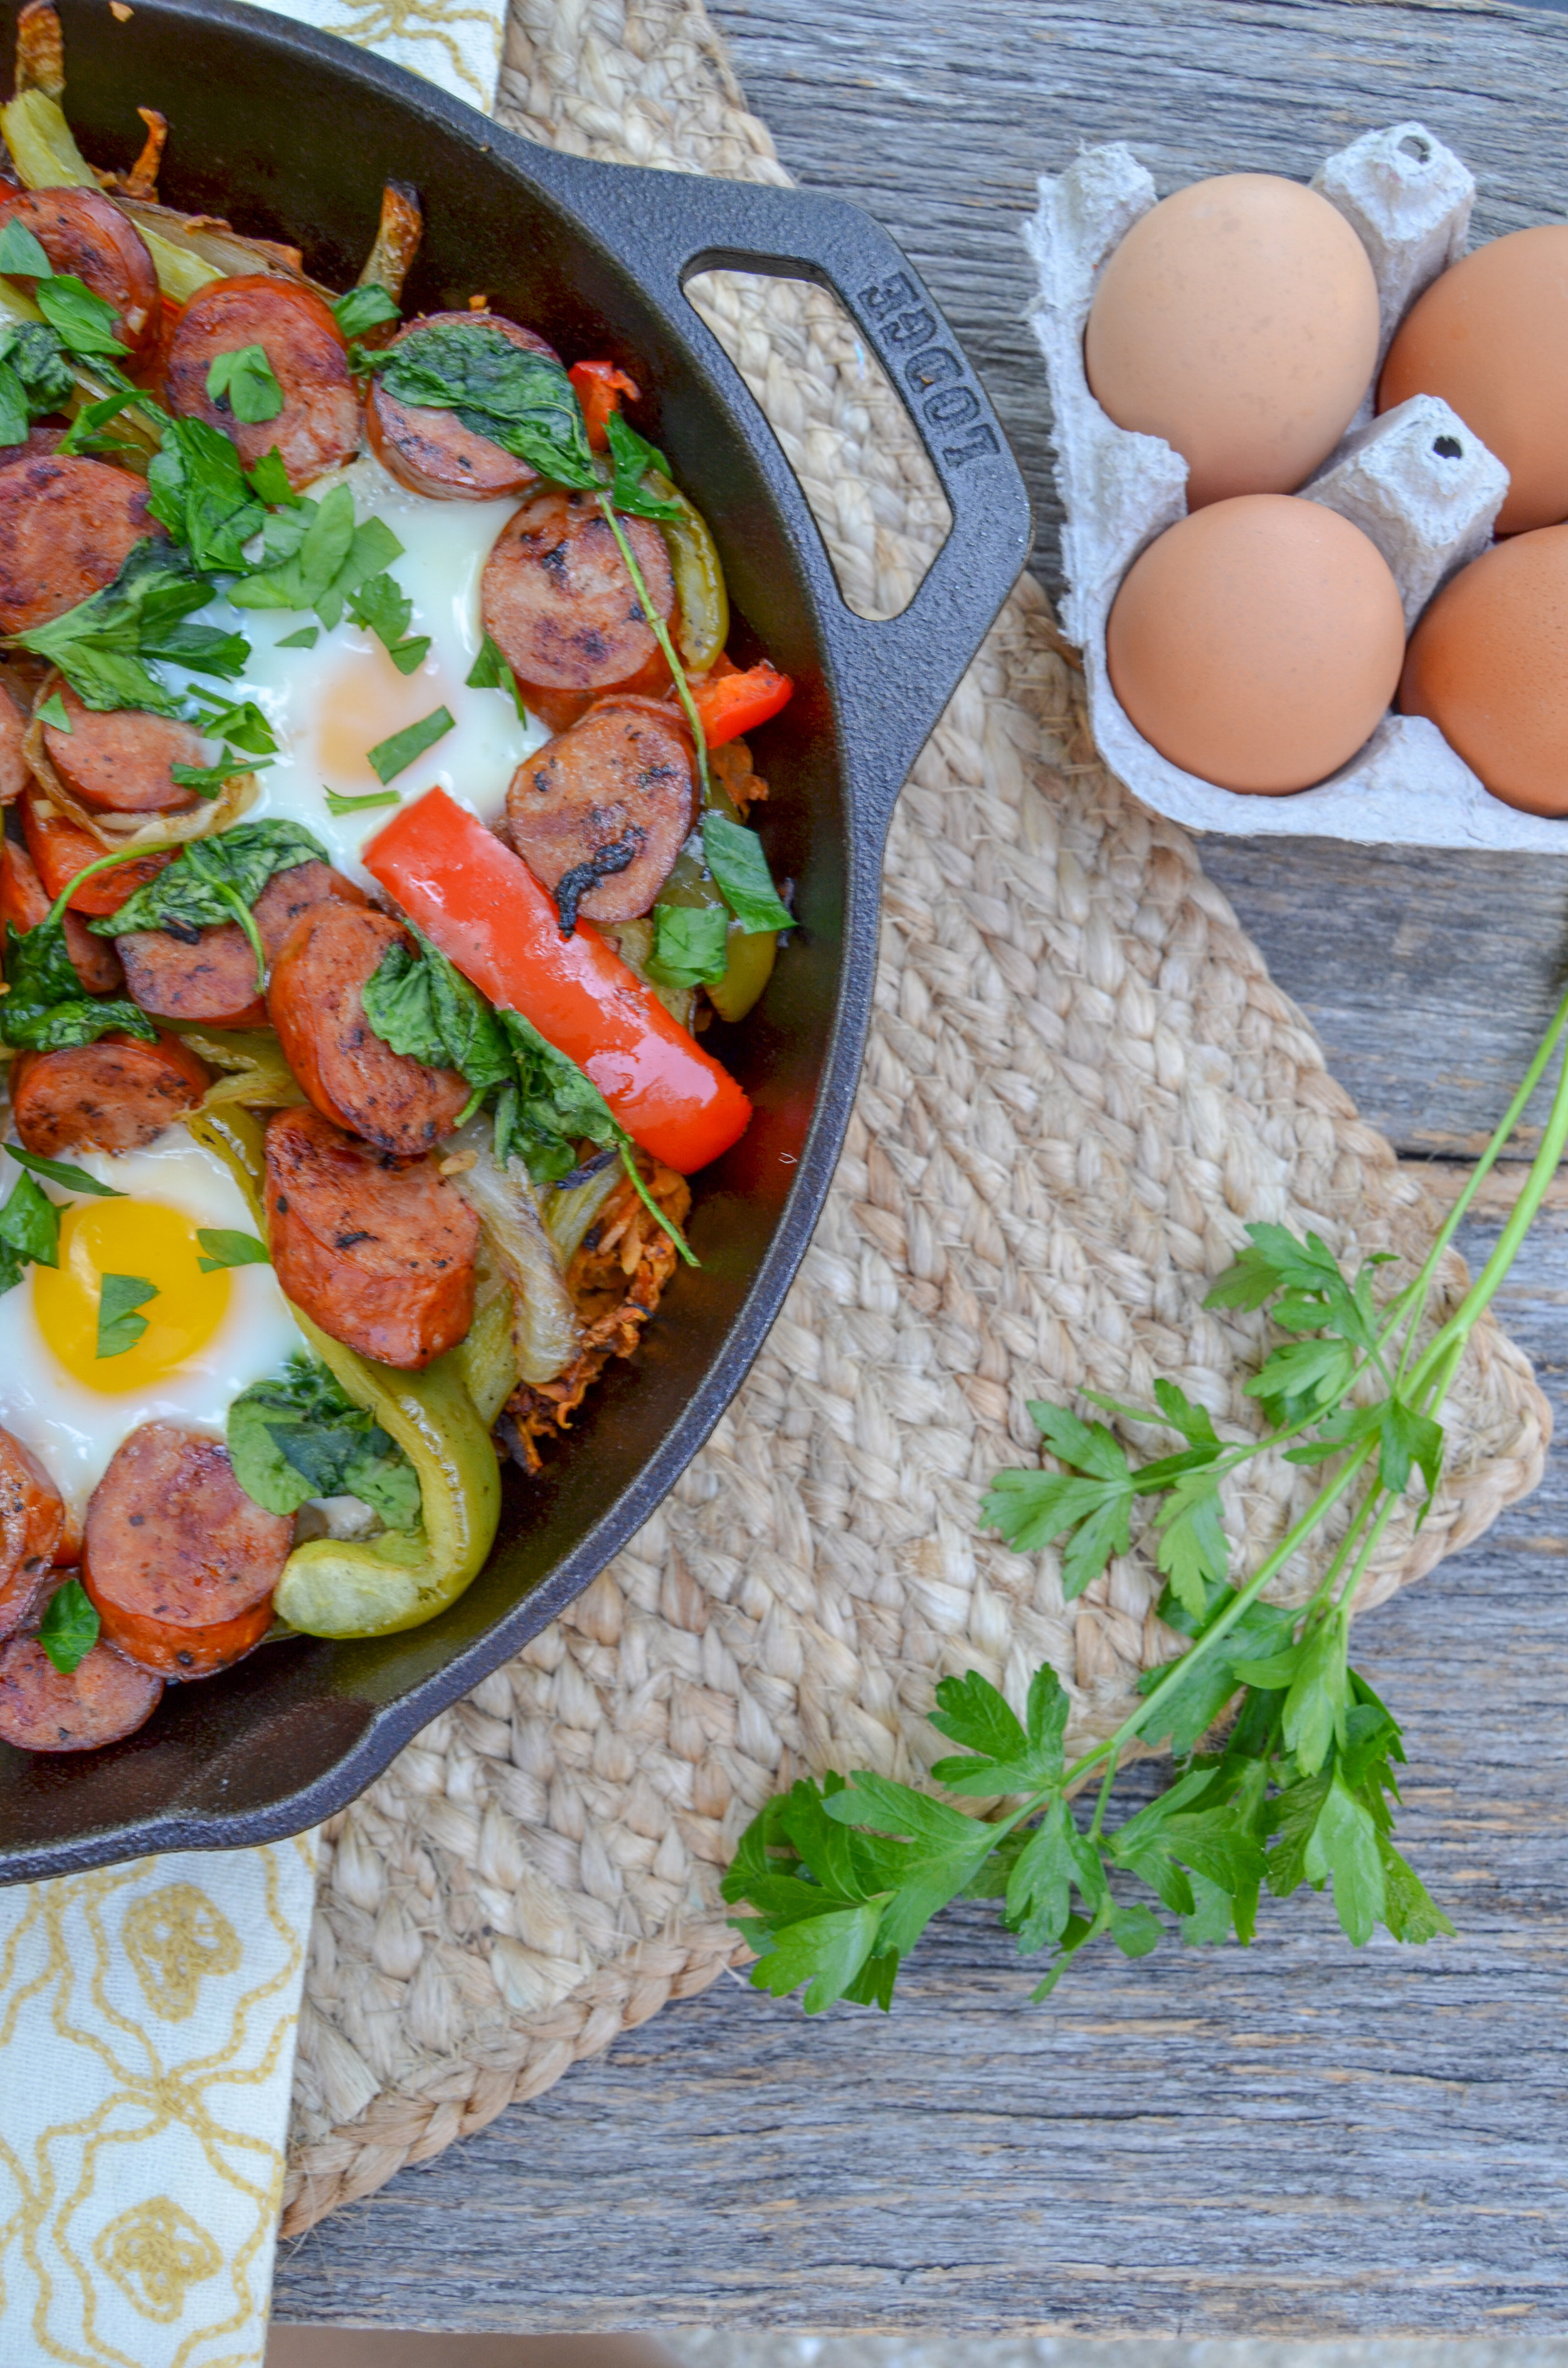
Serve up one egg per person along with a healthy helping of the sweet potato mixture. Since this recipe is flexible, you can garnish it however you want. For example, sometimes I want a more “Southwestern” flavor with a kick. In that case, I would top the skillet with cilantro, avocado slices, cotija cheese, salsa, and hot sauce! Remember, this skillet recipe caters to your needs! ;)
You can also serve this up with a side of toast or on a bed of mixed greens to make sure you get all of the delicious egg yolk!
If you try this recipe, let us know! Leave a comment, rate it, and don’t forget to tag a photo with #fromtherootsblog on Instagram. We love seeing what you come up with!

This breakfast skillet with andouille sausage and eggs is a filling, savory, healthy meal for any time of day!
INGREDIENTS
4-6 fresh eggs
1 large sweet potato (peeled and chopped into small cubes or grated)
1 green pepper chopped
1 red pepper chopped
1/2 cup onion diced
2 cloves garlic minced
1 cup packed fresh baby spinach
8 oz andouille chicken sausage (Applegate)
1 Tbsp coconut oil, plus more for cooking
1/2 tsp smoked paprika
1/2 tsp cumin
1/4 tsp salt
1/4 tsp black pepper
1 small handful parsley (garnish)
DIRECTIONS
Preheat oven to 400 degrees.
Add 1 Tbsp coconut oil to a cast iron skillet over medium-high heat. Once hot, add onions and let cook for 2-3 min until softened.
Add peppers and garlic and cook for 3-5 min until softened.
Set veggies to the side and cook sausage or protein until 5-7 min or until brown and crispy. (If using raw meat, cook until brown and cooked through).
Set protein aside and drizzle more oil in the skillet if necessary. Add sweet potatoes and spices and toss until combined. Cook until the potatoes are soft and crispy on the outside, about 5-10 min.
Add cooked veggies and protein back in the skillet along with spinach and cook until spinach has wilted.
Create a well in the hash mixture for 4-6 eggs.
Crack an egg into each well and bake in the oven, just until eggs are set. Check for doneness after 5 min.
Garnish with parsley and top with your favorite toppings like avocado, hot sauce, salsa, or goat cheese.

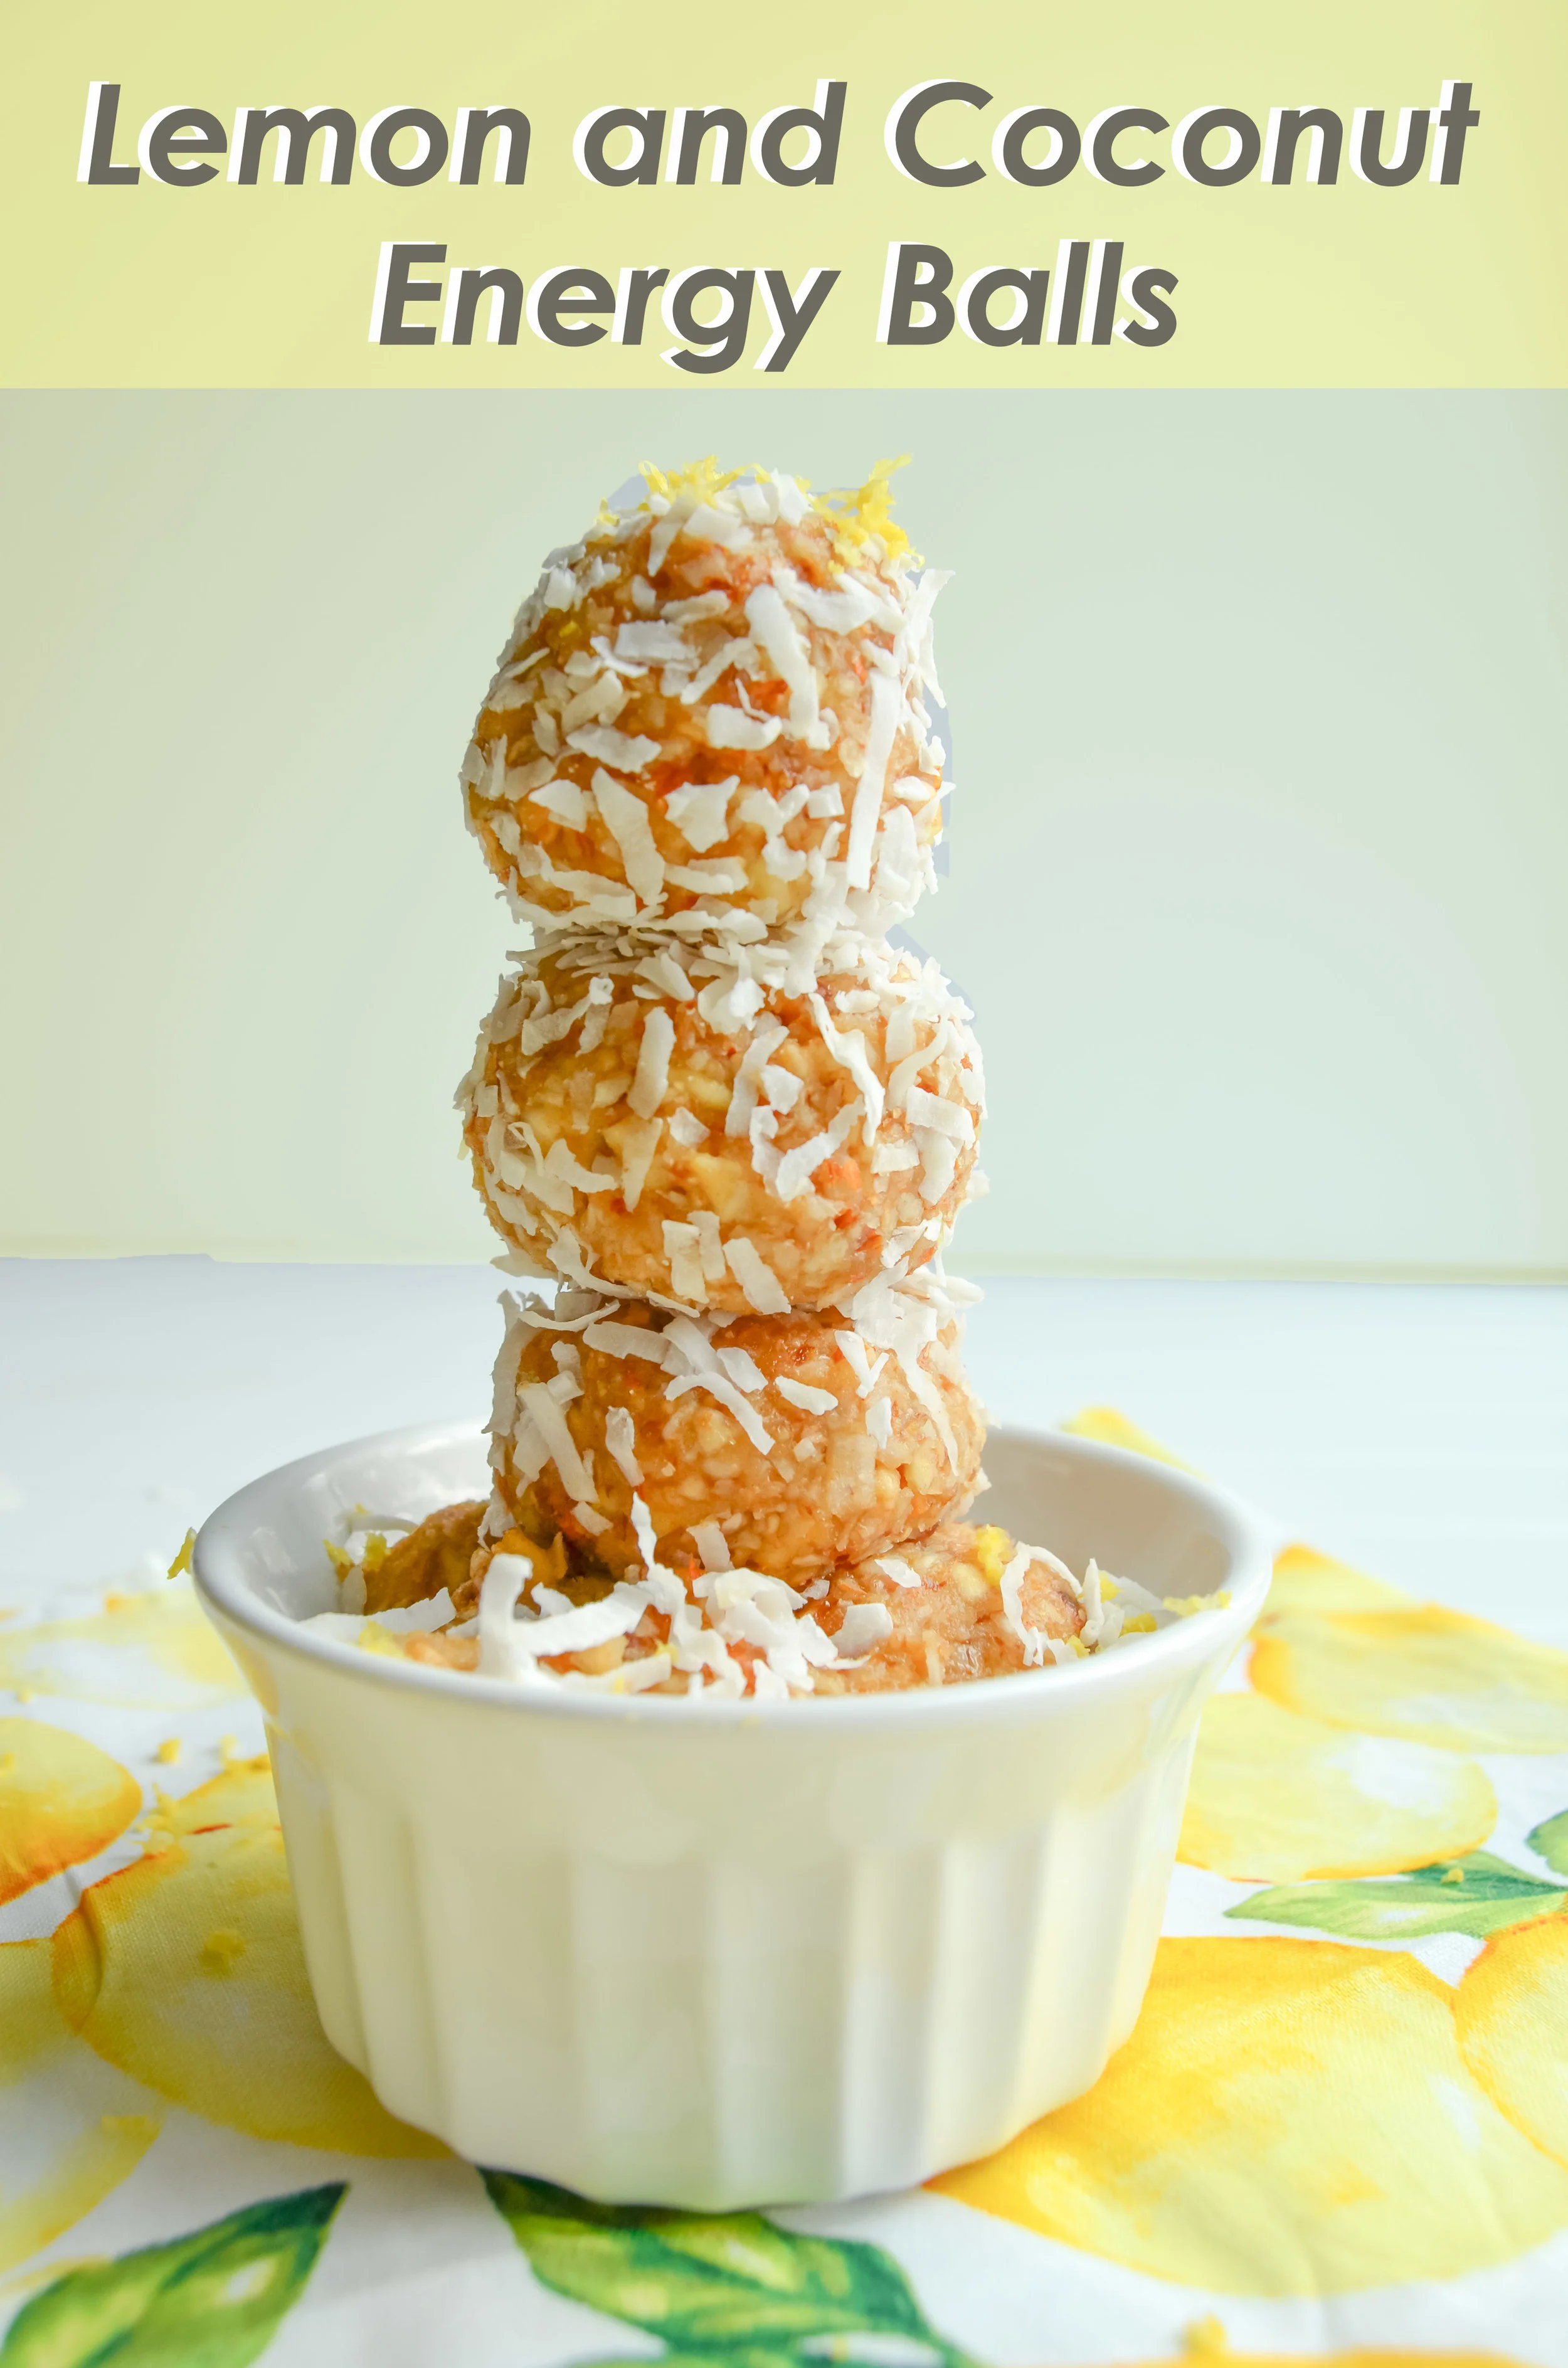
Lemon and Coconut Energy Balls
I have to be honest - life can be hard and stressful for me at times.
I juggle school, work, this food blog, and my personal life all while searching for grad schools. In everything I do, I strive to be intentional in every moment and hour in my life.For example, if I take a class and pass by the skin of my teeth then what have I gained from the experience? With every new practice, patience and persistence are tested as we don’t always get it right the first time. In the midst of the busy times, I have to continuously remind myself that this is only temporary and that I should be proud of myself for getting this far.
Filled with fiber, plant-based protein, and healthy fats, these are the perfect choice when you need a little pick-me-up snack! They are great to make as a “911 snack” as it only takes 5 minutes to make and uses only 6 ingredients!
I have to be honest - life can be hard and stressful for me at times.
I juggle school, work, this food blog, and my personal life all while searching for grad schools. In everything I do, I strive to be intentional in every moment and hour in my life.For example, if I take a class and pass by the skin of my teeth then what have I gained from the experience? With every new practice, patience and persistence are tested as we don’t always get it right the first time. In the midst of the busy times, I have to continuously remind myself that this is only temporary and that I should be proud of myself for getting this far.

As easy as it sounds to be intentional, you need the energy and willpower to actually do it! That’s why I lean on to these amazing lemon and coconut energy balls. Lemon and coconut is an excellent pairing as they are both sweet and refreshing. This flavor-packed combination is great with the caramel undertones of pitted dates; the creamy texture provided by cashews and almonds is also a big plus!


Cashews, almonds, and dates are magnesium-rich foods that actually boost energy and prevent inflammation. Magnesium is key in creating energy by activating ATP; (adenosine triphosphate) which is an energy carrying molecule found in the cells of your body. Ultimately, when you have an adequate amount of magnesium in your system, your body is primed to function at its peak.


Not only are these lemon and coconut energy balls great for providing energy and preventing inflammation, they’re nutrient and calorically dense. Filled with fiber, plant-based protein, and healthy fats, these are the perfect choice when you need a little pick-me-up snack! They are great to make as a “911 snack” as it only takes 5 minutes to make and uses only 6 ingredients! I recommend making a couple of batches so that you can store half in the fridge for immediate use throughout the week and the other half in the freezer for a later time.

If you try this recipe, let us know! Leave a comment, rate it, and don’t forget to tag a photo with #fromtherootsblog on Instagram. We love seeing what you come up with!

Filled with fiber, plant-based protein, and healthy fats, these are the perfect choice when you need a little pick-me-up snack! They are great to make as a “911 snack” as it only takes 5 minutes to make and uses only 6 ingredients!
INGREDIENTS
1 cup raw cashews
1 cup raw almonds
1/2 cup coconut flakes
1 Tbsp melted coconut oil
8 pitted dates
half one lemon *plus more for preference
Zest of one whole lemon *plus more for garnish
Dash pink Himalayan salt
DIRECTIONS
Soak dates in warm filtered water for at least 10 minutes
After dates have properly soaked, remove dates and set date water aside.
Blend all ingredients in a high-speed processor until desired texture. If the consistency seems dry, add a little bit of the reserved date water.
Scoop out about 1 tablespoon of the mixture, and form into balls.
Roll into your favorite toppings! I like to use lemon zest and coconut flakes.
NOTES
These can be stored in an airtight container in the fridge for up to two weeks or in the freezer for up to a month. Make large batches to store snacks ahead of time.
Kale and Pesto Cauliflower Rice
Cauliflower rice has become the new “it” vegetable. Not a day goes by where I don’t see a new cauliflower rice recipe being passed around by all the low-carb, veggie lovers. Even though it may seem like a trend, I am not so sure it will fade away anytime soon. I believe cauliflower rice is here to stay and I am perfectly okay with that! It has become a staple for my dinners as it lowers my carb intake. I also use cauliflower rice when I batch cook since it is so easy to prepare!
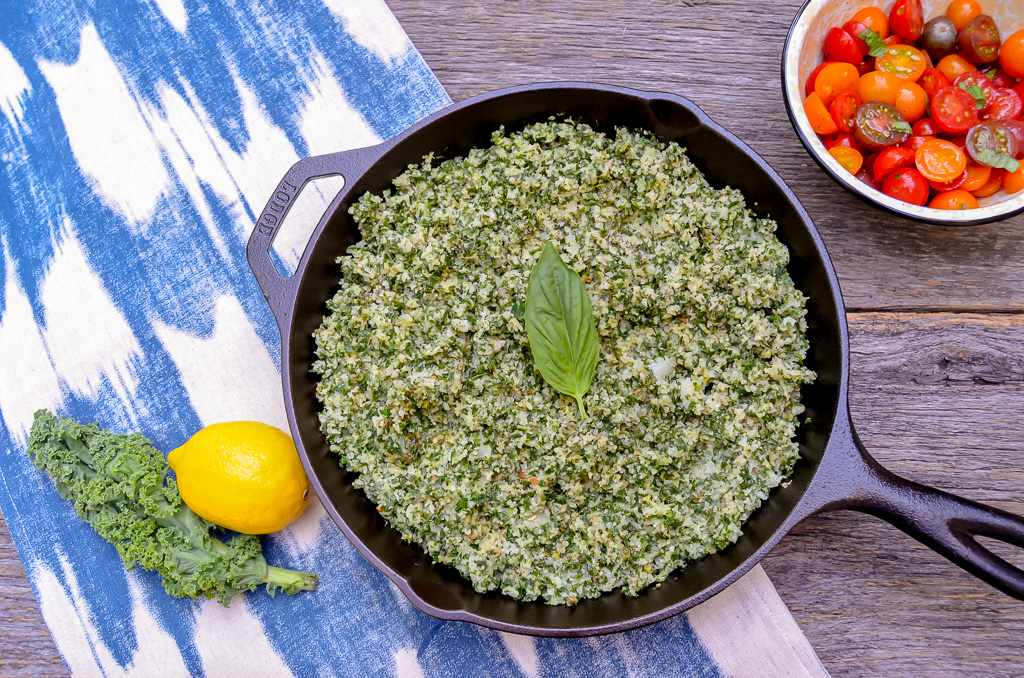
Cauliflower rice is cooked with kale and pesto for a low carb, gluten-free, easy and healthy dish!


Cauliflower rice has become the new “it” vegetable. Not a day goes by where I don’t see a new cauliflower rice recipe being passed around by all the low-carb, veggie lovers. Even though it may seem like a trend, I am not so sure it will fade away anytime soon. I believe cauliflower rice is here to stay and I am perfectly okay with that! It has become a staple for my dinners as it lowers my carb intake. I also use cauliflower rice when I batch cook since it is so easy to prepare!

So, what’s with the hype for this smelly vegetable? Here are some quick facts about cauliflower:
Cauliflower ranks one of the highest powerhouse vegetables according to the Centers for the Disease Control and Prevention’s Aggregate Nutrient Density Index (Ranks food based on nutrient content in relation to calorie total.)
The entire cauliflower (florets, leaves, and stalks) are edible!
Just one cup of cooked cauliflower can provide 73% of your daily recommended amount of vitamin C.
Great source of fiber!
Despite knowing how healthy it is to eat cauliflower, the taste sometimes discourages me from eating it. There is just something about the taste of plain cauliflower that my taste buds do not agree with which is why I have created this recipe in such a way that adds zest and boosts the nutritional value. The wonderful thing about cauliflower is that it’s a vegetable that will take on whatever flavor you add. In this cauliflower rice recipe, I have combined it with my quick and easy 5 ingredient pesto sauce. Kale is used to amp up the veggie and fiber intake, and finally, I add lemon to complement the pesto sauce and bring out the savory taste of kale.
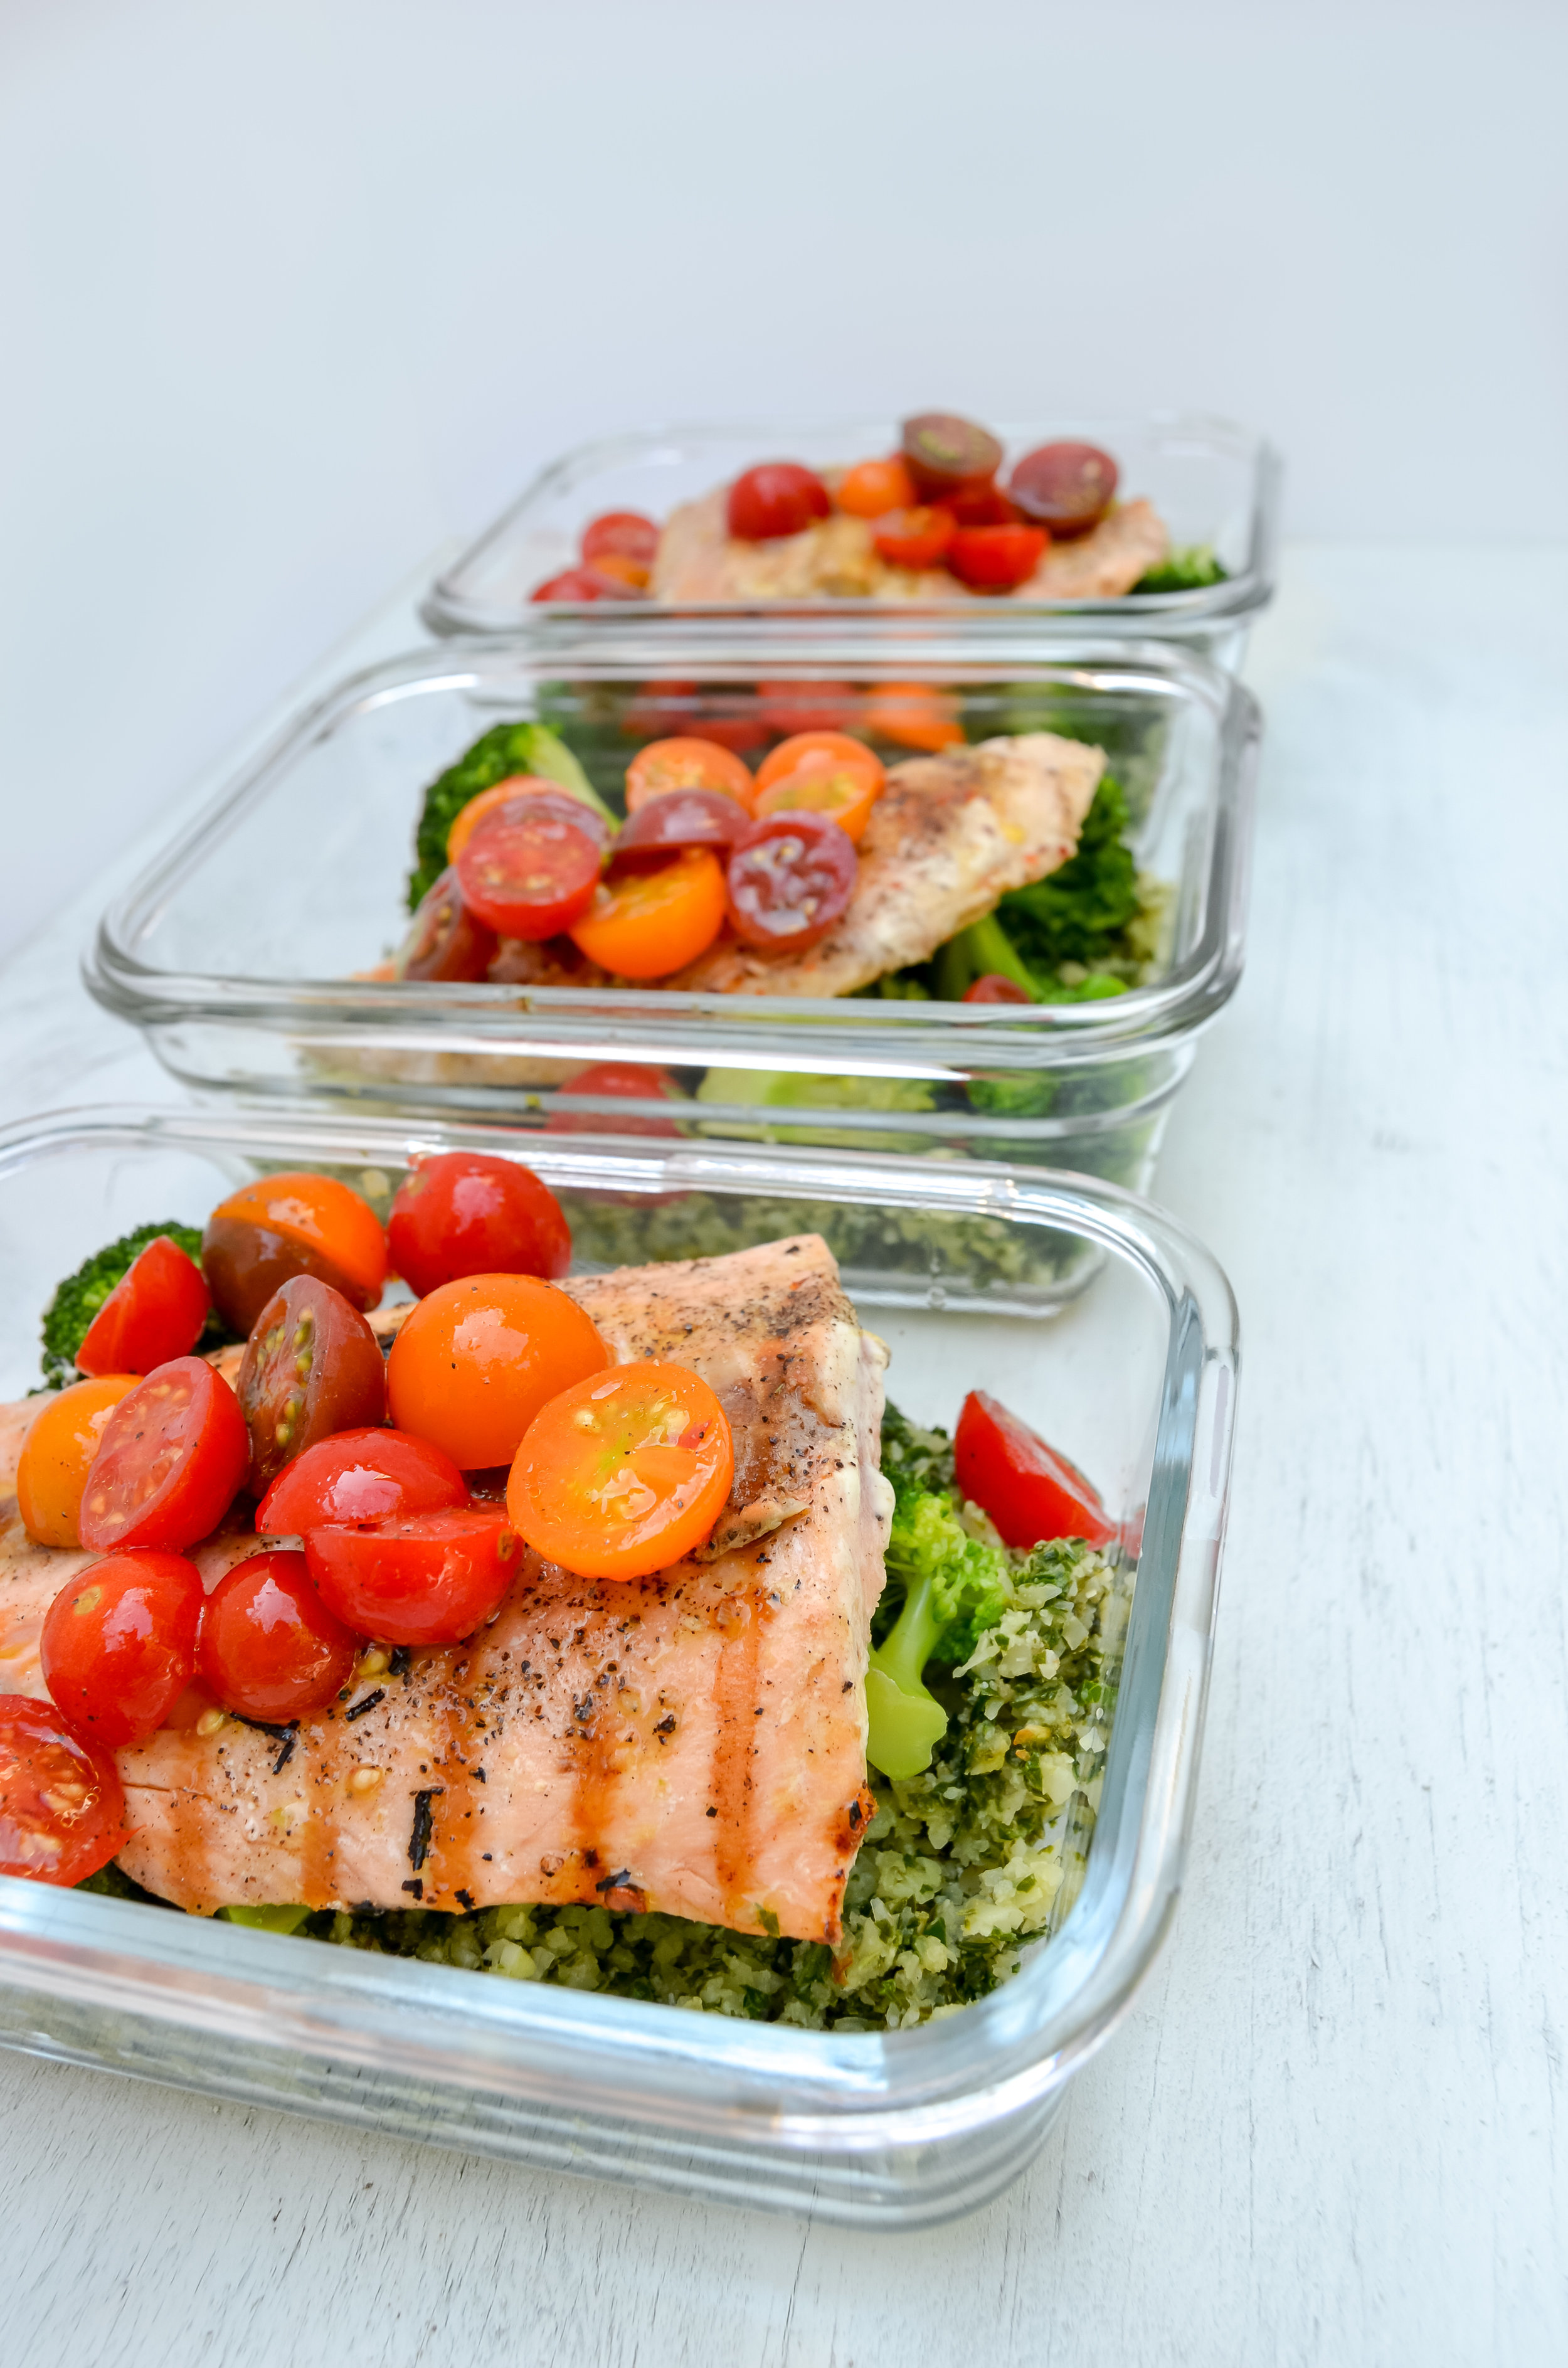
You can use cauliflower rice to substitute your typical heavy carb sides. Here, I have made kale and pesto cauliflower rice for dinner along with grilled chicken, roasted cherry tomatoes, and steamed broccoli.

Cauliflower rice is so easy and quick to make that I often prepare it when I batch cook on Sundays!

If you try this recipe, let us know! Leave a comment, rate it, and don’t forget to tag a photo with #fromtherootsblog on Instagram. We love seeing what you come up with!
Cauliflower rice is cooked with kale and pesto for a low carb, gluten-free, easy and healthy dish!
INGREDIENTS
1 cauliflower head ((or 16 oz bag frozen cauliflower rice))
1 large bunch fresh kale ((stem out))
1-3 Tbsp pesto (less or more depending on preference)
1 tsp coconut oil
1/2 lemon
DIRECTIONS
Begin by bringing about ¼ inch of water to a boil in a large frying pan.
Add ½ tsp fine sea salt and cauliflower florets* (or frozen cauliflower rice)
Cover and steam for about 3-8 minutes until desired tenderness
Drain the cauliflower rice and add back to the frying pan with 1 tsp of coconut oil on medium-high heat. Cook for about 5 minutes.
Add kale, pesto sauce, and S&P. Stir and cook for about 5-10 minutes until rice is crispy, kale has wilted and rice is fully coated with pesto sauce.
Take off heat and garnish with freshly squeezed lemon.
NOTES
*If using fresh cauliflower, cut into florets and then briefly pulse in the food processor until they are the size of grains of rice.
This recipe will make four servings. With that in mind, if you would like to use this in meal prep, divide up your protein, roasted cherry tomatoes with avocado oil and basil, and steamed broccoli.