Sort by Category
- August 2024
- July 2024
- June 2024
- May 2024
- February 2024
- January 2024
- December 2023
- November 2023
- October 2023
- September 2023
- August 2023
- July 2023
- March 2023
- February 2023
- January 2023
- December 2022
- November 2022
- October 2022
- September 2022
- August 2022
- June 2022
- May 2022
- April 2022
- March 2022
- February 2022
- January 2022
- December 2021
- November 2021
- October 2021
- September 2021
- August 2021
- July 2021
- June 2021
- May 2021
- April 2021
- March 2021
- February 2021
- January 2021
- December 2020
- November 2020
- October 2020
- September 2020
- August 2020
- July 2020
- June 2020
- May 2020
- April 2020
- March 2020
- February 2020
- January 2020
- December 2019
- November 2019
- October 2019
- September 2019
- August 2019
- July 2019
- June 2019
- May 2019
- April 2019
- March 2019
- February 2019
- January 2019
- December 2018
- November 2018
- October 2018
- September 2018
- August 2018
- July 2018
- June 2018
- May 2018
- April 2018
- March 2018
- February 2018

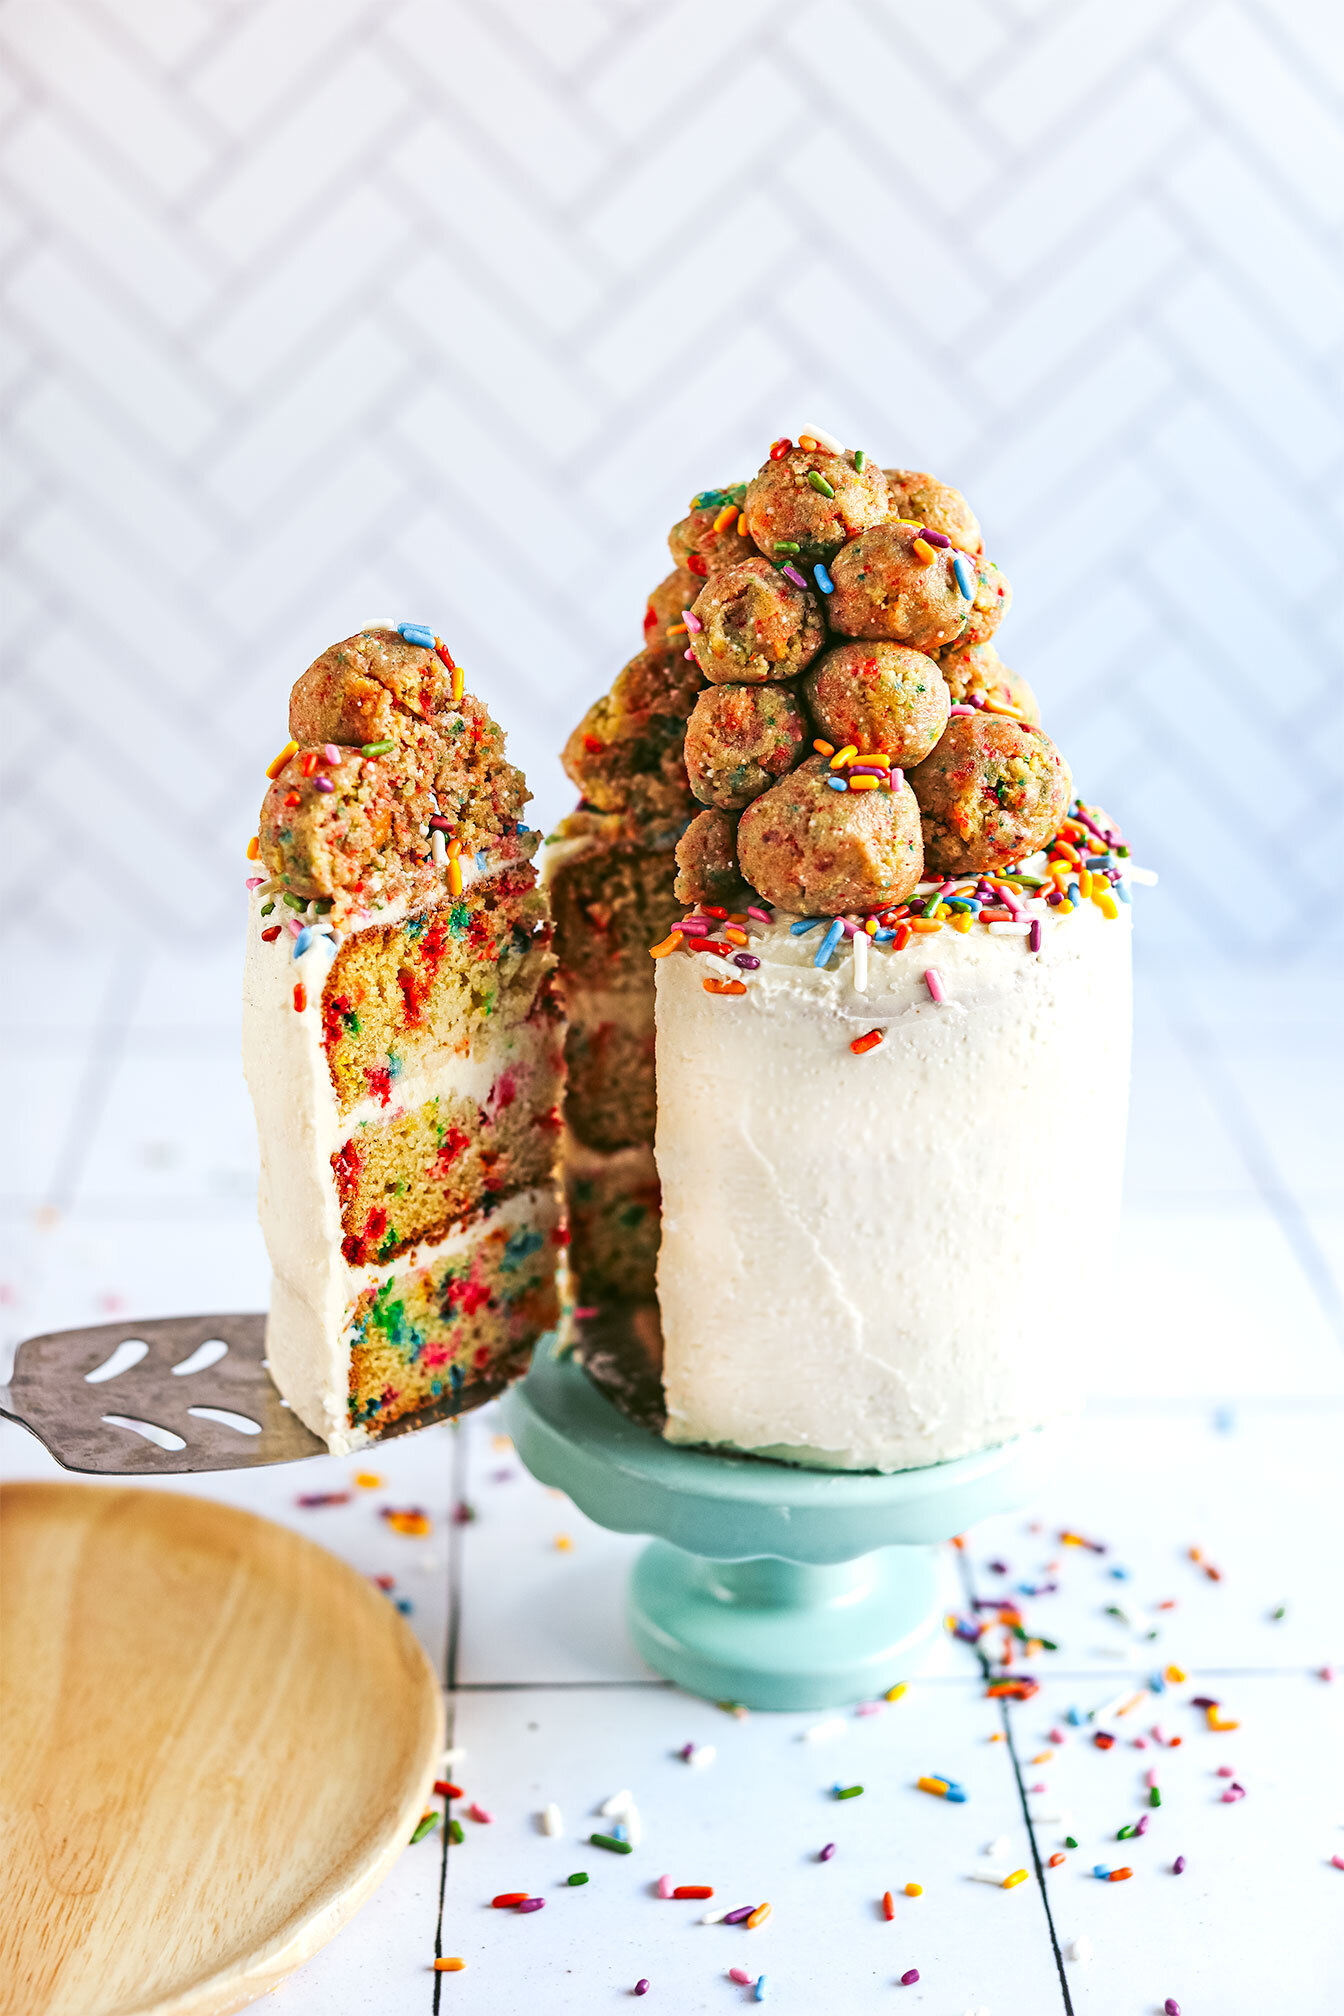
The Best Gluten Free Confetti Cake
The Best Gluten Free Funfetti Cake - Fluffy, tender gluten free cake that reuses layered tops as cake ball garnishes! Includes baking techniques to create that perfect “just came from the bakery funfetti cake.”
I turned the big dirty thirty a couple weeks back (pisces in the house!?) and it feels so good! Ever since I was a kid, I dreamt of this day. For some reason, in my childhood brain, 30 meant that I was going to be a woman. That I would have it all together. That I was going to be successful. And in most ways, it feels that way or at least leading to that prediction.
For so many years, I would let my stomach succumb to a laundry list of ingredients that made me feel like crap for the sake of pleasing coworkers who rarely knew me or family members that “forgot” that I had a gluten and dairy sensitivity. But not this year! This year, I am making my own damn cake! And the cake will have ingredients that I can fully digest and not feel like crap after! Haha
The Best Gluten Free Funfetti Cake - Fluffy, tender gluten free cake that reuses layered tops as cake ball garnishes! Includes baking techniques to create that perfect “just came from the bakery funfetti cake.”
I turned the big dirty thirty a couple weeks back (pisces in the house!?) and it feels so good! Ever since I was a kid, I dreamt of this day. For some reason, in my childhood brain, 30 meant that I was going to be a woman. That I would have it all together. That I was going to be successful. And in most ways, it feels that way or at least leading to that prediction.

For so many years, I would let my stomach succumb to a laundry list of birthday cake ingredients that made me feel like crap for the sake of pleasing coworkers who barely knew me or family members that “forgot” that I had a gluten and dairy sensitivity. But not this year! This year, I am making my own damn cake! And the cake will have ingredients that I can fully digest and not feel like crap after! Haha


So if you feel the same way, you are making a cake for someone with these sensitivities, or just want a really good funfetti cake then look no further!

I’ve been watching a lot of baking shows during COVID: Great British Baking Show Nailed It, you name it! So this cake was inspired by all those late nights drooling over all the glutenous and sugary-laden desserts! Haha!
With that said, even though these recipes are traditional, I learned the techniques that can be applied to gluten and dairy-free baking! With cooking in general, it’s all about learning and finding ways where cooking can work for you! So the techniques used for this cake will, in the end, produce a damn good gluten-free cake.


Directions in the recipe below, provide the techniques used but if you need more information regarding how to: reverse creaming, flat tops for even layering, milk soaking layers, build supported cake layers, frost your cake or leaving it naked, tools needed for a layered cake, and so much more -- check out Erin McDowell’s video on How to Make Layered Cakes and Claire Saffitz Makes Confetti Cake.


If you try this recipe, let us know! Leave a comment, rate it, and don’t forget to tag a photo to #fromtherootsblog on Instagram. We love seeing what you come up with!
The Best Gluten Free Funfetti Cake - Fluffy, tender gluten free cake that reuses layered tops as cake ball garnishes! Includes baking techniques to create that perfect “just came from the bakery funfetti cake.”
Ingredients
1 ½ cups gluten free 1-to-1 baking flour
½ cup organic granulated cane sugar
1 tsp baking powder
½ tsp baking soda
¼ tsp salt
½ cup goat milk + ¼ cup or plant-based milk
1 tsp lemon juice + zest of one lemon
1 egg + 3 Tbsp egg whites (whisked + room temperature)
½ stick grass-fed butter (room temperature)
½ tsp almond extract
⅓ cup (1.75 oz) sprinkles
Frosting
Coconut whipped frosting (homemade or store-bought) or frosting of choice
Toppings
Sprinkles and cake balls (from leftover cake tops + frosting)
Directions
Preheat the oven to 350 degrees F and spray 3 - 4-inch springform pans with cooking spray and line the bottoms with parchment paper. Set aside.
Make your “buttermilk” by adding lemon juice and zest to your goat milk. Let sit for at least 10-15 min. Set aside. *The zest just adds brightness to the cake, not necessarily creating the buttermilk mixture.
Place the flour, sugar, baking powder, baking soda, and salt into the bowl of your stand mixer with the paddle attachment.
Turn the mixer on the slowest speed. Slowly add chunks of your softened butter until everything is mixed and looks like coarse sand.
Add your buttermilk mixture and bump up the speed to 4. Mix for one minute and scrape the bowl. Slowly add the whisked egg mixture, and almond extract and continue mixing for one minute. Stop halfway to scrape the bowl one more time. Mix until combined. Your batter should be thick but creamy and pourable.
Take off the paddle attachment and fold the sprinkles into the batter.
Divide the batter into your greased pans and fill ¾ of the way full. I like to evenly distribute batter by weighing each pan or use a cookie/ice cream scooper to make sure each pan has the right amount of batter.
Bake for 25-30 minutes or until golden brown and a toothpick when inserted, comes out clean.
Remove the cakes from the oven and let them cool for 10 minutes, then gently remove the pan and allow them to cool completely on a wire rack.
Let layers cool completely before stacking and frosting. I like to place my layers in the fridge for about 20-30 min to firm up the cakes for easier stacking.
Before we start stacking, it’s time to start slicing! In order to have even layers for a tall and flat layered cake, we need to make sure each layer is even. Bonus: Slicing the tops off our cakes will make our cake balls for garnish!
Use a knife to score the entire outside edge of the cake - right where the cake stops cooking in the pan (you will see a distinct edge right as it starts to dome up). Go slowly, not too deep, and make sure you are getting down to eye-level.
Take a serrated knife and cut through the cake along the indentation made with the knife marker. The best way of doing this without breaking the layers putting each cake layer on a decorating turntable. That way, you're slowly moving the serrated knife as the cake is turning. Eventually, you will end up in the middle and the top layer should come right off without any buckling or crumbling.
Set the domed top part of each layer to the side in a medium bowl to make cake balls for later.
To assemble:
Spread a bit of frosting onto the middle of the cake board, serving plate, or decorating turntable. (I like to cut out a piece of 4” round cardboard as a base for my cake so that it’s easier to transfer to a serving plate without messing with the finished product) If you are using this method, place the cardboard piece on frosting so that it stays. Dab another bit of frosting on that and then center your first layer on it.
Use a pastry brush or small spoon and dab leftover goat milk onto each cake. Don’t overdo it as you don’t want a soggy cake. Sprinkle extra lemon zest - optional but so good!
Stack the layers on top of one another, using an offset spatula to spread about half-inch frosting between each layer. Repeat each layer with milk dab, zest, and frosting. The last layer, turn the layer upside down so that the cake bottom is on top. *Makes for a clean flat top!
Crumb coat by covering the whole cake in a very thin layer of frosting. You can also pipe in between layers where there are visible holes.
Chill the cake in the fridge until the frosting has firmed up; about 20 minutes.
Apply the final coating of frosting.
To make the cake balls: Crumble domed cake tops in a small bowl with leftover frosting. Combine until you can make a ball without it crumbling. Create different size cake balls and set them aside.
To garnish, sprinkle the cake top with sprinkles or however you would like to decorate and stack cake balls in the center. Let set in the fridge so that everything is firm. Slice and enjoy!
Notes:
Simple Mills vanilla frosting, Sprinkles, cake pans, cake decorating starter kit
Even though goat milk has lactose, I have found that my body tolerates it better than cow’s milk. If you don’t know if you can tolerate goat milk then do plant-based milk instead!

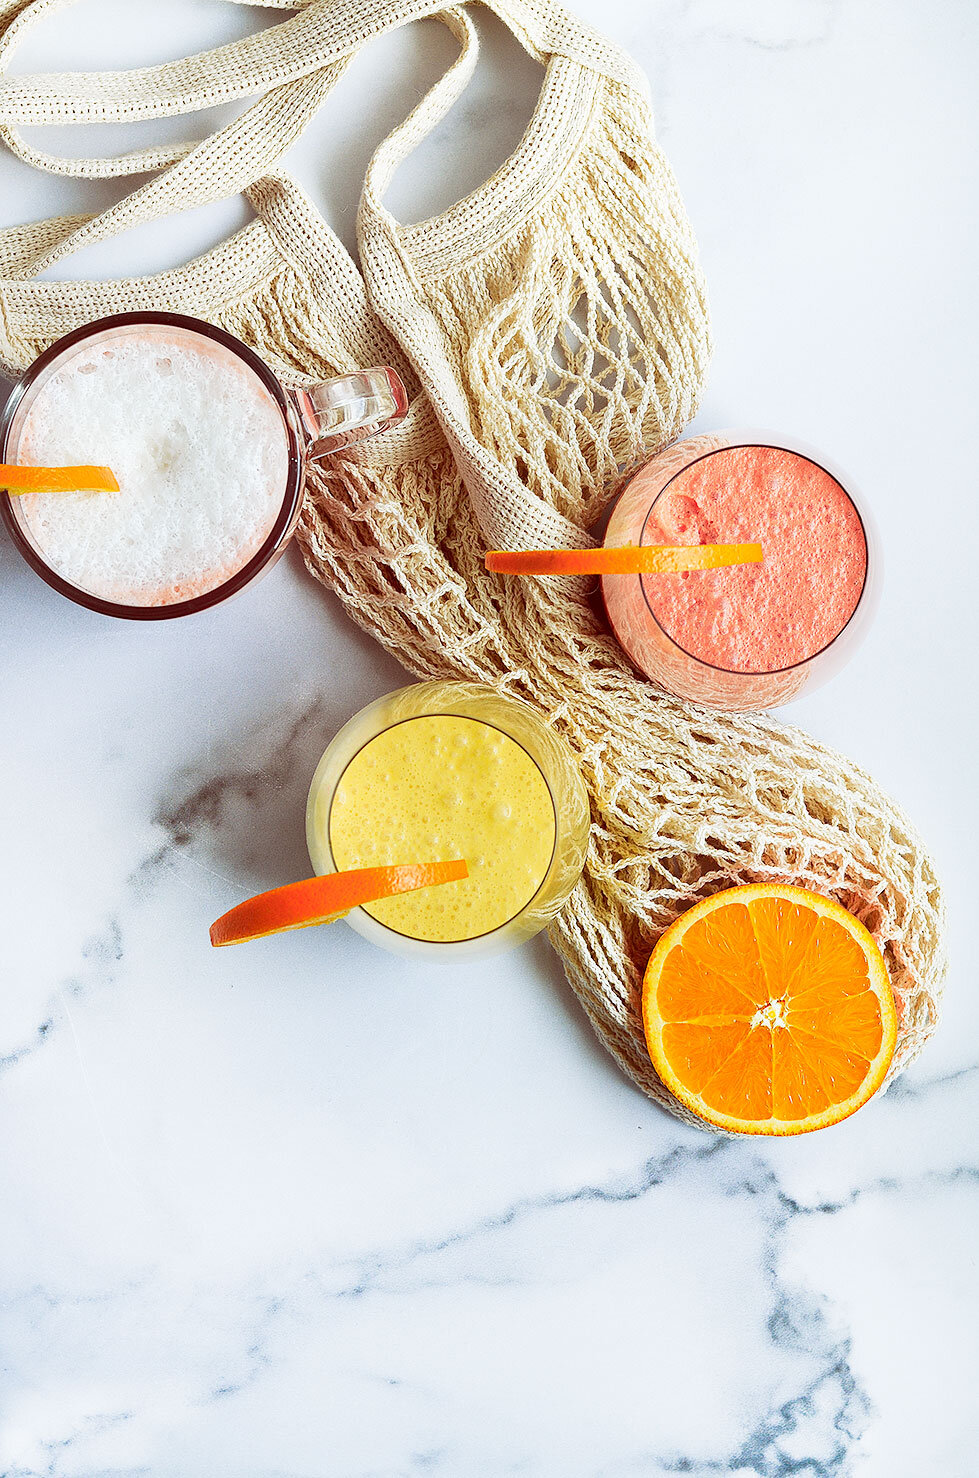
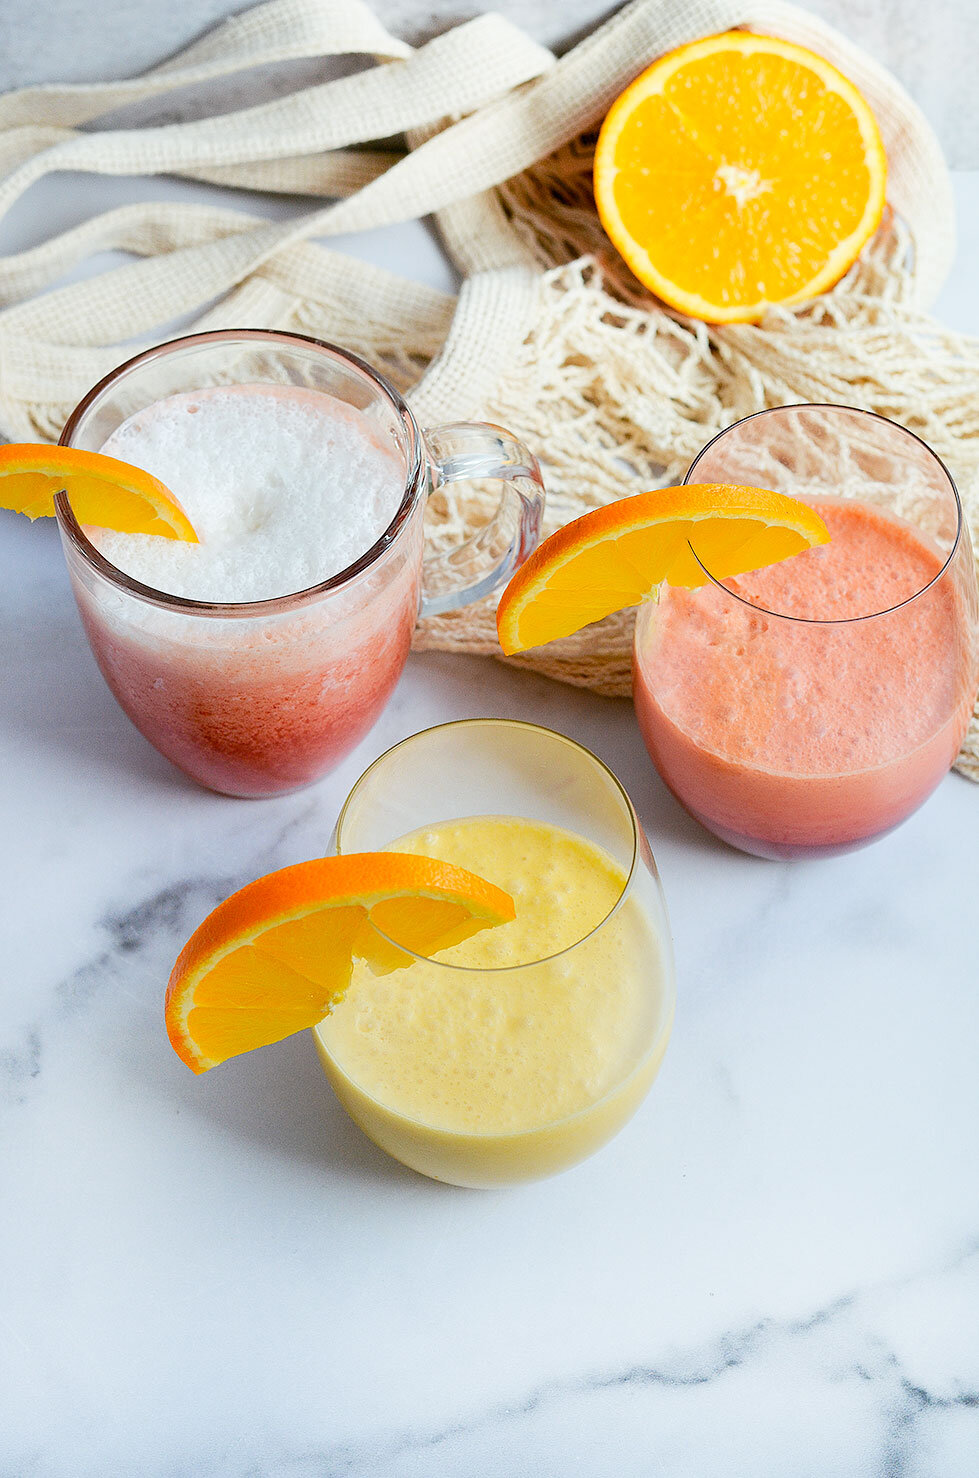
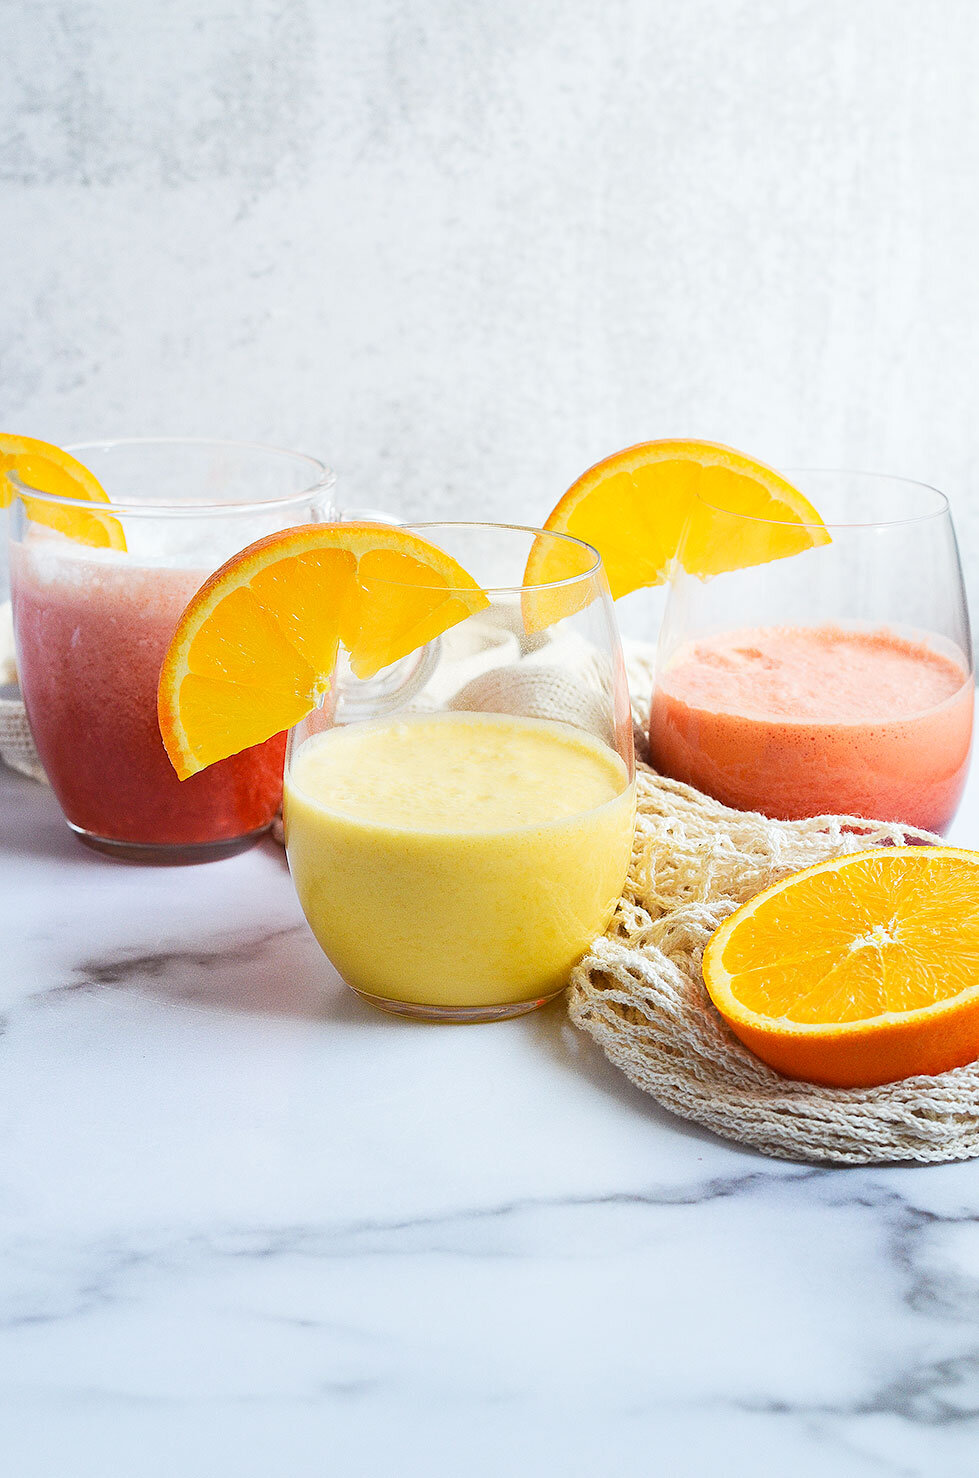
Adrenal Cocktail
Adrenal Cocktail aka “Orange Creamsicle” - Is a magical elixir that supports hormone balance, HPA axis health, and blood sugar regulation.
The #1 drink recipe I recommend to all my clients: The Adrenal Cocktail, or what I like to call, The Orange Creamsicle.
Adrenal Cocktail aka “Orange Creamsicle” - Is a magical elixir that supports hormone balance, HPA axis health, and blood sugar regulation.
The #1 drink recipe I recommend to all my clients: The Adrenal Cocktail, or what I like to call, The Orange Creamsicle.
But why are you recommending a cocktail and what the heck is an adrenal!?

Two very good questions! First and foremost, I’m not sure why this popular drink is called a cocktail seeing as how it’s alcohol free :/ but I recommend this recipe to my clients because most of my clients are stressed, burned out, lethargic, have sleep issues, and the list goes on!

So, what’s an adrenal?
An adrenal are actually hormone glands that are located on top of both kidneys. These glands produce hormones that help to regulate your metabolism, glucose usage, blood pressure, immune system, and response to stress.
The central theme here is balance. We want to make sure that we are supporting our body’s natural ability to regulate blood sugar, increase insulin sensitivity, and improve metabolic flexibility.
One small way we can do that is to make a nourishing drink that can bring balance back and give our adrenals some love in return! Adjusting macronutrient ratios as needed is imperative to reduce spikes in blood sugar and insulin. So for this recipe, our macro ratios are equal in order to support the adrenals while providing essential vitamins and minerals for healing any insulin resistance or adrenal fatigue.

You will need:
Fresh fruit juice (carbohydrate source) - Fruit juice like orange juice has high amounts of vitamin C which is needed when your adrenal glands are producing cortisol during stressful situations. The antioxidant properties are also needed in order to fuel the adrenal glands, protect against oxidative stress, boost the immune system and regulate cortisol production.
I like using this organic orange juice brand because there are no preservatives, no artificial ingredients, no added sugar, nada! As you can see in the picture, I like changing up other fruit juices just to level up the nutritional value of the cocktail. For example, I mix it up with an organic beet carrot-orange juice blend or tart cherry juice.
Coconut Cream/Milk (Fat source) - Coconut milk has stable, saturated fatty acids that help stabilize blood sugar levels and provides your body with energy. Depending on your preference in texture, you can use either unsweetened coconut milk or cream. Personally, I think the cream is better and provides that “creamsicle” taste to the drink!
Hydrolyzed Collagen Powder (Protein Source) - Collagen acts as a blood sugar regulator and provides essential amino acids to support and build a resilient gut and boost cortisol production. My shop page has my favorite collagen of choice, vital proteins.
Sea Salt (Bonus* Mineral Source) - Sea salt and pink Himalayan sea salt contain essential electrolytes and minerals like potassium, sodium, and magnesium that are key for energy production, blood pressure, and adrenal function. Salt also elevates the flavor of the drink so don’t skimp!

When to make an adrenal cocktail
When your energy levels are low between 10-11AM and 2-3PM.
Right before bedtime - if you experience waking up at 3AM
Pre / Post workout snack
Breakfast - If you find yourself not hungry upon waking up and usually skip breakfast, this drink is a great way to kickstart that metabolism!

If you try this recipe, let us know! Leave a comment, rate it, and don’t forget to tag a photo to #fromtherootsblog on Instagram. We love seeing what you come up with!
Adrenal Cocktail aka “Orange Creamsicle” - Is a magical elixir that supports hormone balance, HPA axis health, and blood sugar regulation.
Ingredients
4-6 oz freshly squeezed orange juice or juice of choice
2 Tbsp coconut milk or cream
1 scoop of collagen
Generous pinch of sea salt
Directions
Mix all ingredients in a glass or blender and enjoy!
Notes
You can make this into a latte by simply steaming the coconut milk/cream in a milk frother and pouring it into the glass with the other ingredients. Stir to combine and enjoy!

Mint Matcha Smoothie
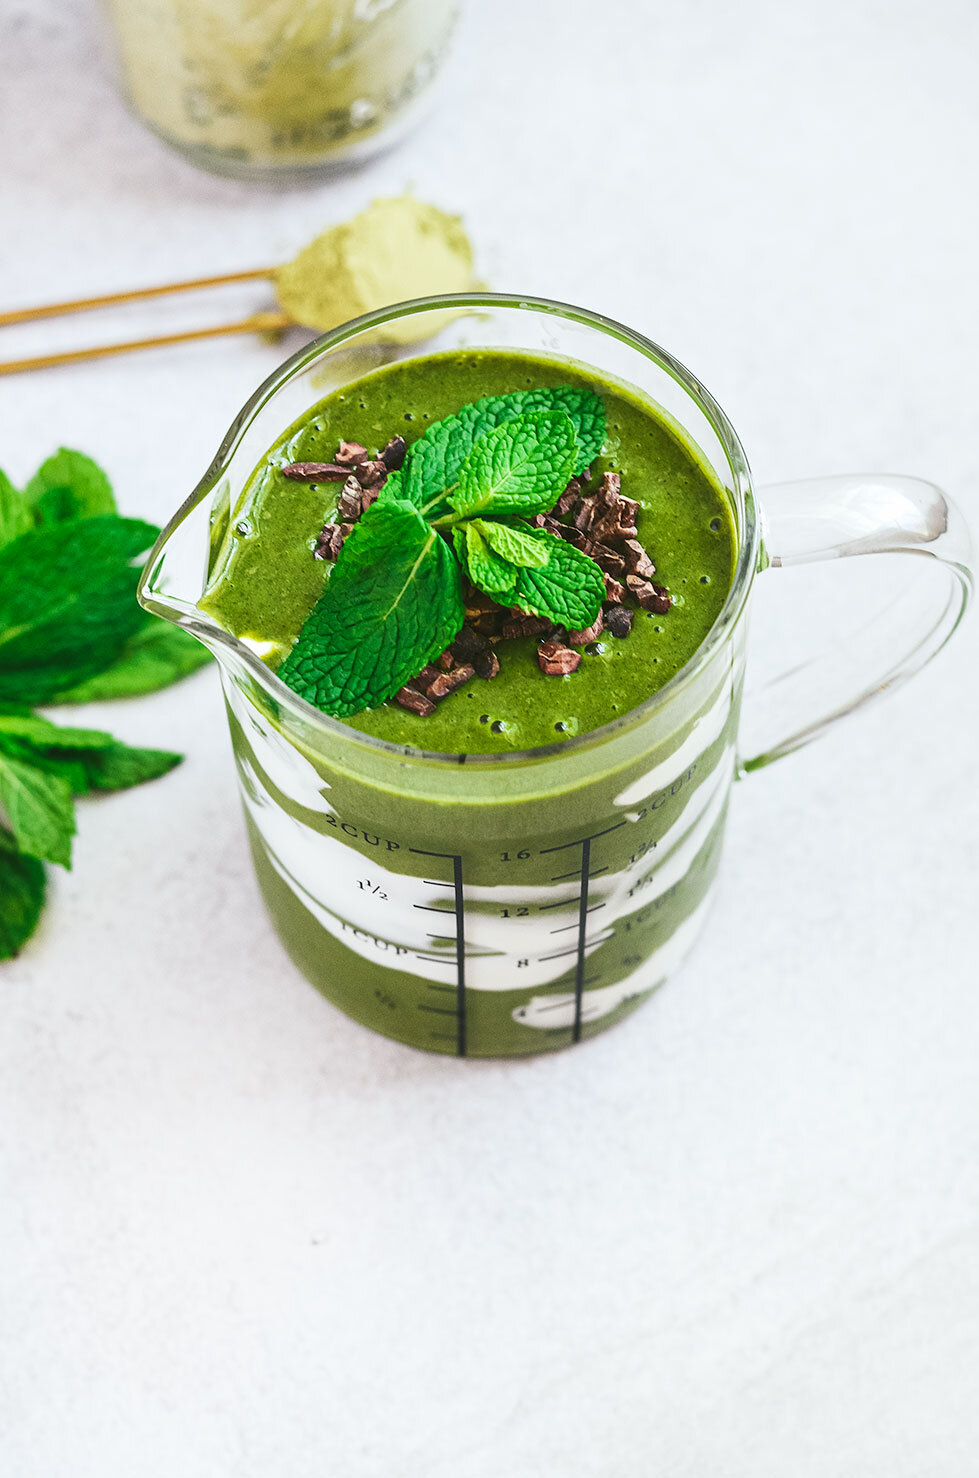
Mint Matcha Smoothie or what some people like to call, the Shamrock Shake! It’s a creamy, refreshing smoothie you can have for breakfast, pre/post-workout shake, or as a dessert! This smoothie is plant-based, naturally sweetened with bananas, and made with only 6-ingredients!
If you love all things mint, then you will love this smoothie. This recipe uses fresh mint and/or peppermint extract depending on your mint preference. My favorite addition of mint flavor is combining fresh mint leaves and CBD peppermint oil drops - so tasty!
Mint Matcha Smoothie or what some people like to call, the Shamrock Shake! It’s a creamy, refreshing smoothie you can have for breakfast, pre/post-workout shake, or as a dessert! This smoothie is plant-based, naturally sweetened with bananas, and made with only 6-ingredients!

If you love all things mint, then you will love this smoothie. This recipe uses fresh mint and/or peppermint extract depending on your mint preference. My favorite addition of mint flavor is combining fresh mint leaves and CBD peppermint oil drops - so tasty!


What really elevates that fresh minty flavor is using matcha powder. Matcha comes from the same plant as green tea but since it is made from the entire leaf, it packs in a more concentrated amount of antioxidants and beneficial plant compounds. And since matcha is naturally lower in caffeine than regular coffee, this is a great alternative if you are wanting to cut back on coffee or incorporate it into your morning routine.

Even though this shake is considered a healthier version to the traditional “Shamrock Shake” feel free to make this when it’s not St. Patty’s Day! Now that you have the flavor combination down, feel free to change up the recipe. For example, add the optional greens powder/frozen cauliflower chunks if you know hitting your veggie goal is not in the cards that day.

If you try this recipe, let us know! Leave a comment, rate it, and don’t forget to tag a photo to #fromtherootsblog on Instagram. We love seeing what you come up with!
Mint Matcha Smoothie or what some people like to call, the Shamrock Shake! It’s a creamy, refreshing smoothie you can have for breakfast, pre/post-workout shake, or as a dessert! This smoothie is plant-based, naturally sweetened with bananas, and made with only 6-ingredients!
Ingredients
1/2 cup frozen banana
1 cup unsweetened plant-based milk (I used my homemade cashew milk blend)
1 heaping handful of fresh greens
1 scoop vanilla protein powder
1 scoop green superfood powder (optional)
Small handful of fresh mint leaves or 1-2 tsp peppermint extract
2 tsp matcha powder
Toppings
cacao nibs, fresh mint, and yogurt
Directions
Add all ingredients to a blender and blend until smooth and creamy. Feel free to add more ingredients depending on preference. For example, add more bananas or another sweetener for a sweeter smoothie.
Nutrition Booster tip: instead of using ice cubes as a thickener, use frozen cauliflower or zucchini. Can’t taste it I promise!
Other Mint Recipes


Spicy Thai Tofu with Crispy Coconut Spaghetti Squash Noodles
Believe it or not, I was a vegetarian for four years when I was a teenager! I know, I can’t believe it either! But when I was a vegetarian, tofu stir fry was my jam! It was something that could be made pretty fast, kept me satiated, and burst with amazing flavors.
Within those years, I thought I was being healthy because I eliminated animal proteins from my diet. What I ended up doing was going into refined carb heaven eating all the desserts, pasta, bread, processed soy products, lots of Taco Bell...
Spicy Thai Tofu with Crispy Coconut Spaghetti Squash Noodles - A plant based dish that is fun and flavorful! Great for dinner, #meatlessmonday, or for your lunch meal prep rotations.

Believe it or not, I was a vegetarian for four years when I was a teenager! I know, I can’t believe it either! But when I was a vegetarian, tofu stir fry was my jam! It was something that could be made pretty fast, kept me satiated, and burst with amazing flavors.

Within those years, I thought I was being healthy because I eliminated animal proteins from my diet. What I ended up doing was going into refined carb heaven eating all the desserts, pasta, bread, processed soy products, lots of Taco Bell...

The imbalance lead to health issues like protein sores in my mouth, skin turning a gray color, lethargy, weight gain, brain fog, acne, the list goes on!

So knowing the route I took on my vegetarian journey, you can probably tell that my go-to tofu stir fry probably wasn’t healthy. Haha, and you guessed right! I used the ramen noodles from the cheap Maruchan noodle packets and half a bottle of soy sauce. I threw in a bag of frozen oriental stir fry veggie mix and cubed tofu and that made the entire dish seem healthy in my mind.

And this is not to say that everyone who is a vegan/vegetarian is not healthy. Just like eating meat, being paleo, intuitive eating, counting macros, celery cleanse, etc, it’s all about having a diet rich in nutrient-dense, properly prepared, whole foods. That’s it. So wherever you are at in your journey with food, keep that in mind. And if you are just starting, here is a great post to help you in discovering what that looks like for you and your own personal journey.

One thing I will make a note of about this dish is that we are using organic sprouted tofu as our main protein source. In order for this meal to be properly prepared, I use organic sprouted tofu as the source of my protein. The reason that I chose sprouted over regular tofu is that the health benefits far outweigh. The sprouting process improves digestion and increases nutrient absorption. It also contains more protein and higher levels of calcium than regular tofu.
If you try this recipe, let us know! Leave a comment, rate it, and don’t forget to tag a photo to #fromtherootsblog on Instagram. We love seeing what you come up with!
Spicy Thai Tofu with Crispy Coconut Spaghetti Squash Noodles - A plant based dish that is fun and flavorful! Great for dinner, #meatlessmonday, or for your lunch meal prep rotations.
Ingredients
Coconut Noodles
1 medium spaghetti squash
½ cup unsweetened coconut milk
¼ cup toasted coconut flakes
1 Tbsp avocado oil
Marinade
14 oz organic sprouted extra firm tofu
¼ cup unsweetened coconut milk
1 Tbsp red curry paste
3 cloves garlic (minced)
1 Tbsp fresh ginger (minced)
1 Tbsp gluten-free low-sodium tamari sauce or liquid (coconut) aminos
1 Tbsp arrowroot starch
1 tsp fish sauce (*vegan fish sauce if vegan)
Peanut Sauce
2 Tbsp creamy organic peanut butter
1 Tbsp gluten-free low-sodium tamari sauce or liquid (coconut) aminos
1 Tbsp water
2 tsp chili garlic sauce
1 tsp fresh ginger (minced)
½ tsp coconut sugar
½ juice of a lime
Garnish
¼ cup unsalted peanuts, chopped cilantro, chili garlic sauce, lime wedges
Directions
Preheat the oven to 450 degrees and line a baking sheet with aluminum foil.
To make the spaghetti squash, cut the squash in half lengthwise, scoop out the seeds and lightly drizzle with oil and salt and pepper. Place squash face down on the baking sheet and roast for 35-45 minutes or until the squash peels easily away from the skin. Set aside to cool before dragging a fork across the squash to create noodles.
To make the tofu, once you are done pressing the tofu to get the excess liquid out, cut into cubes and add to a Ziploc bag. In a small bowl, add all the marinade ingredients and mix until well combined. Pour mixture into a Ziploc bag and toss tofu to coat. Let sit for at least 15-30 minutes.
While the tofu is marinating, make the peanut sauce by adding all sauce ingredients to a small bowl and whisk vigorously until ingredients are well combined. Should be smooth and creamy yet pourable.
Once the squash has cooled down and you have scraped out all the squash into noodles, transfer to a large skillet that is set on medium-high heat with about 1 Tbsp oil.
Saute in the oil for 5-10 minutes or until crispy. Add coconut milk to the noodles and cook for an additional 5-10 minutes or until most of the liquid has cooked off and you are left with crispy yet moist noodles. Take the skillet off the heat and garnish with toasted coconut flakes. Set aside.
You can either bake the tofu in the oven or cook in the same skillet you just used for the spaghetti squash noodles. I like to cook the tofu in the skillet to give it a crispy texture.
Transfer noodle mixture into a large bowl and top with the tofu. Drizzle peanut sauce over the dish or put in a small serving dish to have on the side. Garnish with toppings and enjoy with chopsticks!
Notes
Ingredients that I use: canned organic unsweetened coconut milk, tamari, soy-free version - coconut aminos, sprouted organic tofu, fish sauce, organic peanut butter, vegan fish sauce, chili garlic sauce
Meal Prep Version: divide noodle mixture and tofu into 4 containers and keep the peanut sauce/garnishes in a separate container so that you can pour over the mixture and garnish when ready to eat.
Feel free to add roasted veggies to the dish like peppers, onion, carrots, and zucchini or steamed veggies like snap peas and broccoli.
Plant-based protein alternatives: chickpeas, tempeh, beans or use chicken if you are wanting an animal based protein source.